
This technique is used in patterns for the tiny narwhal, the Thwickeds and the tiny parrot, among others.
This technique is a super easy way to bind off live stitches for a neat seam that grafts the stitches together. It’s a common knitting technique, but I’m sharing a tutorial of my own because my technique is different from most. (I don’t turn the knitting inside out first, because most of my patterns are constructed out of closed shapes that can’t be turned right side out again.)
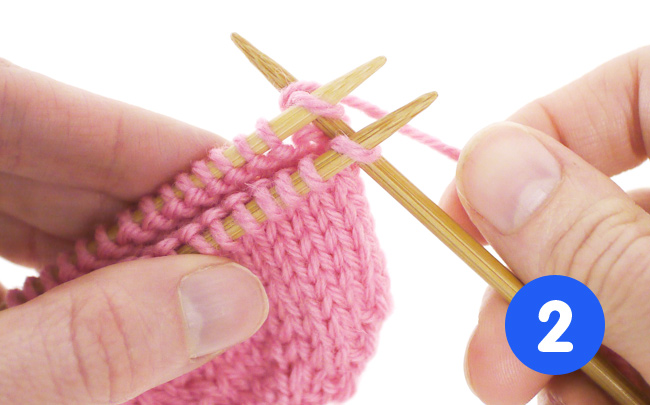
1. Divide the live stitches onto 2 needles, with the working yarn attached to the rightmost stitch on the back needle.

2. With a third needle, knit the first front-needle stitch and the first back-needle stitch together.
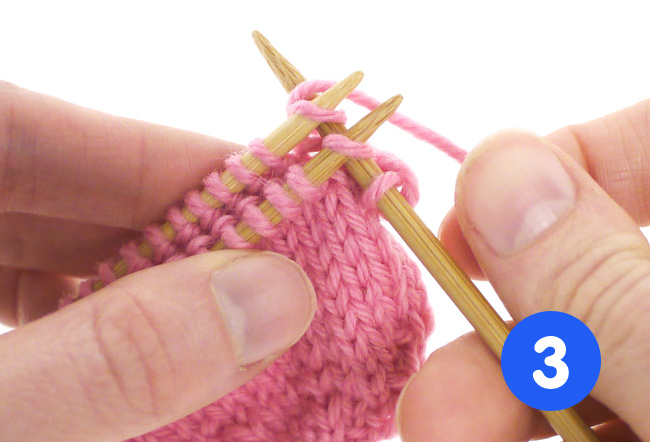
3. Knit the next 2 stitches from each needle together in the same way.
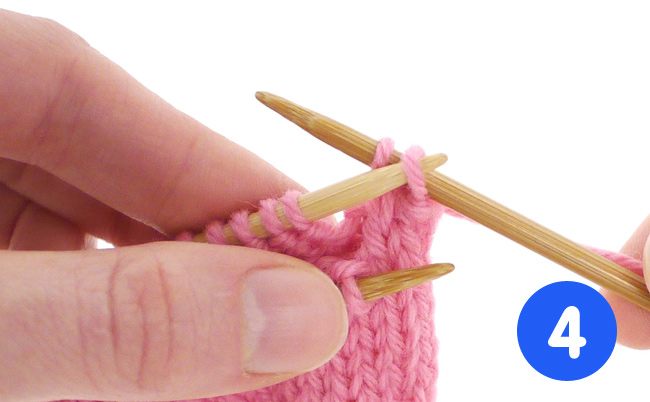
4. Slip the first stitch on the right needle over the second stitch, as you would for a regular bind-off.
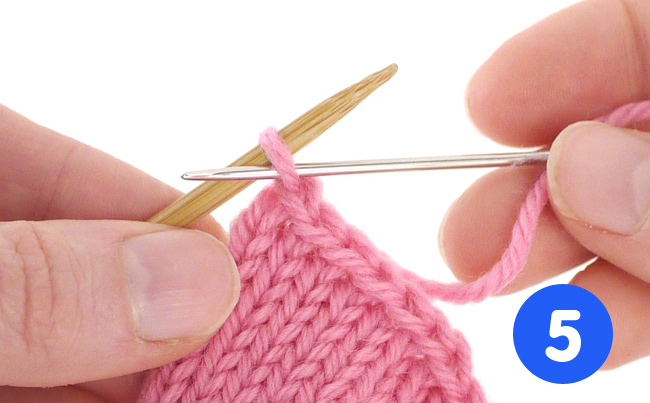
5. Repeat Steps 3 and 4 until you are left with one stitch. Cut the yarn and draw the tail through the stitch to finish off.
You will end up with a seam that has a row of purl stitches on one side—when I use this bind off, it’s always in a place where those purl stitches won’t disrupt the design. If you’re looking for a more invisible bind-off, try kitchener stitch.
Thanks for tip : )