Category: Knitted Things

Errata for Huge & Huggable Mochimochi

Some nice knitters who got early copies have let me know (nicely) about a few problems.

Page 63, Baby Capybara, body and head

At the beginning of this section, you should cast 4 stitches onto 1 DPN, not 3 DPNs.

Page 70, Baby Cakes’ Frosting

After Row 122 in the frosting section, this sentence should be added:

Break the yarn and draw it tightly through the stitches with a tapestry needle.

Page 81, Big Mike’s Tomato

The finishing instructions were omitted.

After completing Rnd 65, lightly stuff the piece. After completing Rnd 67, break the yarn and draw it tightly through the stitches with a tapestry needle.

roland_errata
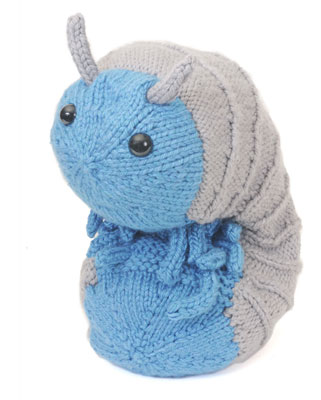
Page 90, Roland’s Shell

This is how the section should read:

With A, cast on 37 stitches onto the circular needle to work flat.
Row 1: Sl1, p to last st, sl1.
Row 2: K4, [p1, k3] 8 times, k1.
Rows 3-7: Work in established rib for 5 rows, slipping the first and last stitches on the odd-numbered rows.
Row 8: K4, m1, [p1, k3, m1] 8 times, k1 (46 sts).
Rows 9-13: Work as established for 5 rows.
Row 14: K5, m1, [p1, k4, m1] 8 times, k1 (55 sts).
Rows 15-19: Work as established for 5 rows.
Row 20: K6, m1, [p1, k5, m1] 8 times, k1 (64 sts).
Rows 21-25: Work as established for 5 rows.
Row 26: K7, m1, [p1, k6, m1] 8 times, k1 (73 sts).
Rows 27-31: Work as established for 5 rows.
Row 32: K8, m1, [p1, k7, m1] 8 times, k1 (82 sts).
Rows 33-43: Work as established for 11 rows.
Row 44: K7, k2tog, [p1, k6, k2tog] 8 times, k1 (73 sts).
Rows 45-49: Work as established for 5 rows.
Row 50: K6, k2tog, [p1, k5, k2tog] 8 times, k1 (64 sts).
Rows 51-55: Work as established for 5 rows.
Row 56: K5, k2tog, [p1, k4, k2tog] 8 times, k1 (55 sts).
Rows 57-61: Work as established for 5 rows.
Row 62: K4, k2tog, [p1, k3, k2tog] 8 times, k1 (46 sts).
Rows 63-67: Work as established for 5 rows.
Row 68: K3, k2tog, [p1, k2, k2tog] 8 times, k1 (37 sts).
Rows 69-74: Work as established for 6 rows.
Row 75: Sl1, p to last st, sl1.
Bind off all stitches.

And the book is missing the explanation for m1.

Page 104, Buddy Boy’s Headlights

The color work noted for Row 13 is incorrect. It should read:

Row 13: P1C [p1E, p1C] to end.

Page 103 & 105, Buddy Boy’s Flames

The chart on page 105 is noted to have 9 rounds, but it’s only 7. Aside from the round count, the chart is correct.

If you spot any other problems with the patterns in this book or in any of my patterns, please get in touch! Sometimes mistakes that seem obvious get missed by lots of people, and you may be the first to tell me about it.

Arcade Mochi: Face Off

I think I figured out why my squishy arcade guy was staring at me so hard: there was something weird about his face! I got the feeling that something in particular was stopping me from taking the next step in designing, and when I thought about it, his screen seemed just a tad on the small side. So I took a few minutes to give him a face transplant.

arcade_face

I’ll probably make the final version in a different color, but I wanted to focus on the size and shape for now. All I did was take out the black border that originally framed the screen, and extended the screen by six stitches and six rows. It’s a closer match to my original sketches, which I think are important to refer back to throughout the design process. I’m feeling better having made this change, and now hopefully I can move forward again with this guy.

Arcade Mochi: The Staredown

Do you ever get the feeling you’re being watched?

arcade_stare

The first half of last week was very busy with exciting future book stuff, and I spent the second half of last week on a last-minute mini summer vacation in New Hampshire. Just a few days away from the city was a nice break—and I got to visit the lovely Gather Here in Boston while I was at it!

Now I’m returning to a big to-do list and a big squishy arcade cabinet that won’t stop staring at me. There’s much planning and charting to do before I get back to the knitting part of him, but I’m determined to make progress on it soon!

In the meantime, here is a photo of Soupy in my yarn stash from yesterday.

soupy_stash

Arcade Mochi: Taking Shape

Before I jump into my progress on the Untitled Arcade Mochi Project, I thought I’d share some of the images I’ve been obsessed with over the past few weeks.

arcade_images

Whenever I’m working on a any project that’s based on a real thing in the world, I like to do an image search after making my initial sketches. It’s important to me not to model a design on any particular image, but seeing a lot of whatever it is I’m making (whether it’s arcade cabinets, armadillos, or meatloaf) all together gives me a quick reference for general shapes and proportions.

So to refresh, I started with a sketch and some vague ideas about what direction I wanted to take my arcade toy in, and then after sketching and a little color design, I began the knitting part of the process with the screen. Then I did a little more sketching based on my screen, along with a little math to get to a starting point with the rest of the toy.

What followed were many hours of knitting something that doesn’t look like much of anything, just to figure out the shaping and exact stitch/row counts.

arcade_shape1

So much black!

I started by making a base that’s as wide as the screen, then after picking up stitches around the flat piece, I continued knitting the sides and back as one piece and the front as another. I could have knitted them in the round up until the control panel shelf, but I have it in mind to add intarsia colorwork in several places later, which will require flat knitting.

I had some general row counts jotted down in my notebook, and I’m altering those a bit as I go and see how the shape is coming out. If knitting were as structured as something like cardboard, then getting the shape right would really just be a matter of checking gauge and doing a little math. But since knitted fabrics are stretchy and squishy, some tweaking of the design is usually required along the way.

This morning I finished knitting the back and sides, all the way up to where the top of the screen would reach. And separately I finished knitting the front, which right now is just one long flat piece. It didn’t look like much of anything until I stitched it together and stuffed it full of stuffing…

arcade_shape2

… and then gave the thing a lot of poking and massaging…

(This is the moment of truth, when I’m playing the “Is this anything?” game with myself.)

arcade_shape3

…. and yes, it’s starting to look a bit like an arcade game! But you can’t really tell, can you, because it’s all black and really hard to see on a screen.

It occurs to me that I could have used a different color yarn for this trial run, which may have let me (and you) see everything better, but I was just too excited to jump into this project and I couldn’t get black out of my head. Well, here’s the side view at least, so you can see that there is indeed some definition to the shape.

arcade_shape4

I’m happy with the progress so far. I have a few possible changes in mind—maybe the screen should be bigger?—but nothing major that requires a big change. So now I need to stop and think about colorwork. I’d like to integrate coin slots on the front and stripes on the back and sides, plus maybe some color on the control panel. Having the basic, physical shape right in front of me is a great way to figure out exactly where I want all of these designs to go, which I’ll sketch out using a color-filled grid in Illustrator.

I can’t tell if I’m being overly vague or overly detailed in recording my design process, but putting it all down in blog posts certainly makes me more conscious of how I go about working on a design. That seems like a good thing to do every once in a while. I’ll have an update all about colorwork designing soon!

Arcade Mochi: The Screen

We have a screen!

arcade_screen1

So in my last post about my arcade game design, I had a couple of sketches and a general idea about the shapes that would be involved. With any design featuring a screen (like Error and TV Guy), I always start out designing that part first, since it’s going to be the “face” of the character, and I can figure out the dimensions of everything else based on that.

As you can see, I made my intarsia color design on my computer. I use Illustrator for this, because its Live Paint Bucket feature lets you make a grid and then fill in colors really easily. But even when I make it on a computer first, sometimes I need to make adjustments after knitting. This was my first version of the screen:

arcade_screen2

It was’t tall enough the first time around. You might wonder why I didn’t just make a grid with more accurate stitch proportions on my computer—the reason is just that I’ve never bothered to make a “master” grid to start with, and that’s something I should probably do. Just because I’ve been designing for seven years doesn’t mean that I’m always organized and doing everything the most efficient way possible.

After finishing a screen that I’m happy with, it’s time to be a little more specific about figuring out the rough dimensions and stitch/row counts for the rest of the project. That means doing something that I actually don’t do that often: checking my gauge.

arcade_screen3

I tend to only do this when I’m designing something with more structure and strong angles, and not when I’m making an animal or other character with mostly round shapes. My gauge-checking is not so complex (just measuring how many stitches and rows per inch, then doing some multiplication), but it’s helpful as a guideline for how many stitches to cast on and how many rows to work on the base of the design. Another sketch follows, with more annotations.

arcade_screen4

At the same time, I’m still thinking about what this arcade’s game might be, and how that would affect the design. If I’m going to use more intarsia on the cabinet, I should at least have a general idea of what that will look like and where it will start. I hope to figure that out and get started on the rest of the piece soon. Stay tuned!

Arcade Mochi: The Sketch

Good news! I’m in the middle of working on new designs for a future book! Not Huge & Huggable Mochimochi, which is coming out October 15th, but something even newer than that. It’s very exciting! The bad news is that while I’m putting most of my creative energy into this project, I can’t really share any of it here, or else I’d have to kill you all.

Instead, I thought it would be fun to share a different knitting project that’s just in its infancy, especially because it’s a challenging design that may take some time. It’s an arcade game!

arcade_sketch

(You can see that I’ve also had doughnuts on the mind.)

I’m so excited for this project—you’ve got the screen, all the surfaces of the cabinet, plus the joysticks and the coin slots. So much fun detail! And if I’m making an arcade game, it might as well be something specific, so I’m also brainstorming about what kind of game it could be. John suggested Super Mochi Sisters, which might be too awesome not to go with.

Right now I’m still in the sketching stage. but once I’m feeling a little more solid on the direction of this guy, I’ll get started with the knitting. I’ll probably begin with the screen, then I’ll build out the rest of the design based on that, and I’ll try to document my progress here as it comes along. So check back for updates!