Category: Shop Talk

Shop Talk: Shipping

shoptalk9

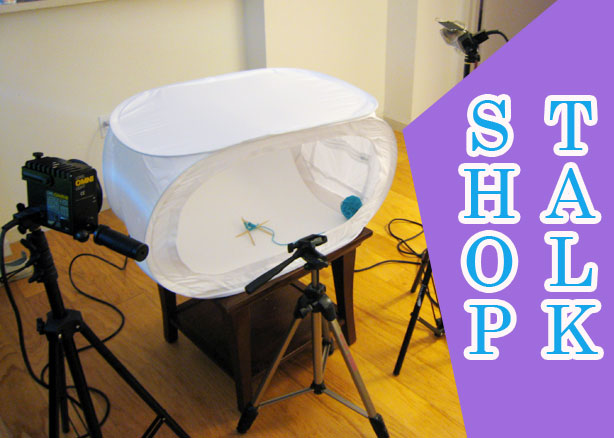
Shipping is a topic that I’ve been wanting to cover here for a while now, but I’ve put it off because there is just so much to say, and I also don’t have a broad knowledge of all the different options—I just found what works for me. But just sharing that much could be helpful to someone who doesn’t know where to begin, right? So today I’m sharing everything I know about shipping.

Continue reading “Shop Talk: Shipping”

Shop Talk: Being Your Own Boss

Last night I realized that I didn’t have a Shop Talk post planned for today, and I started to feel a bit panicky. But then I remembered that there’s no one making me write these posts every Friday; in fact, I might be the only one who even notices if I don’t write one. Freedom! And yet here I am, writing a Shop Talk post. Why? Because my boss said so.

shoptalk7

Don’t let any frustrated freelancers kid you—being your own boss is awesome. You get to set your own hours, you can drop everything for a new crazy project if you want to, you get to go to the grocery store during non-peak times… it’s like normal life, but better. All you have to do is be able to tell yourself what to do. That means more than just motivating yourself to get stuff done and managing time—it means setting goals and figuring out a career path on your own. These things can be really hard when you also feel like you’re kind of improvising all along the way.

Working for yourself requires a balance of structure and chaos, and solo work and collaboration. I think that’s reflected in this little list I’ve put together of things that help me be my own boss. Hey, speaking of lists…

Lists
When I was a kid, I hated any classroom exercise that involved lists or outlines. My creative powers couldn’t be boxed in! But at some point the awesomeness of list-making was revealed to me, and now I am all about lists: I make a list of goals at the beginning of each year, I make a list of stuff I want to do for each month, each week I start a list for stuff that I want to get done each day, and every morning I make a list for the day. Lists are the closest substitution for having someone tell you what to do, so the idea is to take them seriously. But it’s also important to know that lists can be constantly revised based on changing situations. I don’t usually get to everything on my day’s list, but that’s not a failure—the purpose of the list is so that I don’t have a moment in the day where I feel aimless or bored. There are probably hundreds of list-making apps for your phone, but I prefer to use simple text documents and sticky notes for mine, for instant access and easy revisions.

Deadlines
Deadlines serve a similar function as lists, but I use them in a different way. I make myself deadlines for significant stages in a project—for example, if I’m working on a new pattern, I set a date by which I’ll have something to send to my tech editor, a date for when I’ll send it to testers, and a date on which I’ll release the pattern on my website. I put all of these on my calendar along with my doctor appointments and galas and other important events. There’s something about putting things on my calendar (which is on my computer and sends alerts to me on my phone) that makes me take them seriously.

Time Off
Without a break, all the endless lists and looming deadlines can be a real slog, so taking time off is important, but tricky. I have no qualms about taking a Tuesday afternoon off to visit a museum, but then you’ll probably find me working most of the following weekend. And I’m never totally off of my email for any length of time—John and I have to be the 24-hour customer service staff if someone has a problem with a purchase. But aside from the annual burnout, I’ve found a way to balance my schedule so that it works for my own lifestyle—almost always working, but super flexible hours, and a few extra curricular projects. And at least a couple of actual sort-of days off each month. If that means moving deadlines back sometimes, that’s fine. Plus, big ideas need time and space to develop, so taking a walk on a beautiful morning instead of editing patterns can pay off.

Mentors
One of the tough things about my job is that, while there are tons of successful creative people out there whom I admire greatly, there’s no one person I can point to and say “I want to do what they’re doing,” and use them to model my career after. But that doesn’t mean that I can’t have mentors, experienced professionals who are willing to give me advice and help open some doors. I’ve been so lucky to encounter people who are generous with their time and resources just because I asked nicely and they liked my work enough to help me out. Without really consciously doing it, I’ve managed to put together a team of mentors who support various interests of mine, including yarn shop owners, authors, designers, artists, and artist reps. It’s important to have someone to turn to when I need some advice or an introduction, and these relationships all came about naturally, just through an email or because I talked to someone at an event.

tnna11_5
Just hanging with Debbie and Nell Bliss, as you do.

Peers
Like mentors, peers are awesome for advice and sharing resources, plus they’re great for an empathetic response when I need one. My ideas about what’s possible in my own career have certainly be enhanced by seeking out other designers, authors, and artists who are going through a similar process as me. And like with my mentors, anybody who shares some aspect of my work can be a peer to me. Shout-outs to Stacey Trock and Kim Werker in particular!

Online Resources
Obviously, the internet is there to help. I don’t go overboard with reading advice for people running small businesses, but I do occasionally check out the Biz Ladies series on Design Sponge, which is written by guest bloggers who run amazing small, creative businesses. The Designers group on Ravelry, which I’ve been mentioning a lot lately, is also a great place for someone like me to be. I don’t post there myself very often, but just reading what other designers are talking about helps me feel like part of a community of professionals.

Being a good boss to myself is really different from being a boss to someone else, which I may have to do someday. But at least I’m pretty happy with my own boss, even if my boss thinks I could have written a better blog post today. Maybe it should have been two separate posts, about time management and figuring out a career path. Whatever, boss.

Previous posts in this series:

Tech Editing and Pattern Testing

Online Marketing and Social Media

Writing Books

On Being Burnt Out

Self-Publishing Patterns

How I got Started

Shop Talk: Tech Editing and Pattern Testing

In my last Shop Talk post, I did an overview of how I market a new pattern after I release it on my website. Today I’m going to take a couple steps back and talk about how I make sure that the pattern is as clear and user-friendly as possible with the help of some very important people: my testers and tech editor!

shoptalk6

First, some definitions. A tech editor is someone who goes over a pattern closely, checking the stitch counts, row counts, measurements, and all the knitting language, correcting any errors or unclear wording along the way. A pattern tester is a knitter who tries out a pattern before it’s public to make sure it works like it’s supposed to.

If you ever visit the Designers group on Ravelry, you’ll see much discussion about these two roles, and which is more important. The short answer is that while you can certainly release a pattern without using either a tech editor or a tester (and I’ve certainly done this on occasion), if you want to make sure that the pattern is as good as it can be, both a tech editor and testers are a really good idea. But the way these two checking processes work is different for each designer.

My tech editing/testing process

I’ll admit that it’s only recently that I’ve started having all of my patterns tech edited. I know other designers would find that shameful! But my main two reasons were that my patterns don’t needed to be graded for different sizes/measurements and my testers were already fantastic about noticing errors and typos. However, my tech editor (a former tester) has done wonders for my patterns and now I wish I had started working with her earlier.

So now, when I have a close-to-final version of a pattern, with all the images included, I send it off to my tech editor first. We agree on a date by which she’ll send me her notes, usually a week or so from the time I send it to her. I’m sure all tech editors are different, but mine has a superhuman attention to detail, and she makes notes on even the tiniest bits of wording. I love this about her, even though it means that when I get a pattern back from her, it looks like it’s been in a knife fight! Once I receive this very red document, I go over all of the suggested changes, most of which I accept.

My tech editor’s contribution is more than just correcting numbers and punctuation—she questions wording that I’ve used for years with the goal of making it make better sense. In this process, it’s important for me to forget my ego for a bit and just take the feedback at face value. Sometimes that’s hard when I’ve already poured hours into pattern writing, but being open to another perspective is only going to make me a better designer.

After I’ve revised my pattern with my tech editor’s help, it’s time to send it to my testing pool. I keep this process simple: I have a list of about 40 testers, and I send an email to them all (using BCC) with details on the pattern (the size, the type of yarn and needles needed, the techniques involved), a photo of the finished project, and a deadline for sending feedback to me (usually 2 weeks out). The first 3 or 4 people who reply with interest will get the pattern to test. Testing means following the pattern as written and letting me know if they run into any questions, typos, or anything that seems unclear to them. I also request a photo of their finished project.

If a pattern requires a particularly large amount of yarn or some kind of special yarn that most people don’t have on hand, I do my best to send the testers yarn to work with. But for most tests, my testers can just use scraps from their stash—this makes perfect sense to me, as I think most people who use my patterns do the same anyway. It’s also interesting to me to see how a pattern turns out for someone using a really different type of yarn than the original design.

So testers provide me with a final-final check of a pattern, to make sure that everything in it “works” in another person’s hands. At this stage, I’m not anticipating making significant changes to a pattern, but sometimes a big change has to happen when multiple people have the same problems with one section. In that rare situation, I make the change (possibly re-knitting and re-photographing the toy), then I run it by my tech editor, and then find a couple of new testers to try out the revised version. All of that adds time to what’s already a long process, but taking some steps back at this point is better than having a sub-par pattern that hundreds of knitters will be frustrated with.

One more thing that testers do—they create finished projects! If they share their photos online at the time of a pattern’s release, other knitters can see that the results can be replicated. If you’ve ever searched for a pattern on Ravelry, you know that it’s a huge plus to see that multiple people have used it already and have created cool things!

tinycats

Finding (and compensating) a tech editor and testers

From the Ravelry discussions that I’ve read, finding a good tech editor can be difficult, as they’re in high demand. I got lucky—my tech editor found me, and she happens to be one of the best. If you’re looking for a tech editor, a good place to start would be this thread in the Indy Pattern Designers group. (The discussion was started 6 years ago, but is still actively being posted on by people seeking tech editing work.) A good tech editor is not necessarily a prolific designer, but she or he should be extremely well versed in all types of knitting techniques and should have a good grasp of writing styles and abbreviations for knitting patterns. This is a professional position, and should be treated as such: references are a good idea! This is also work that should be paid for, and it’s a good investment that a designer should be willing to make.

What you should be looking for in test knitters is quite different: a test knitter should represent the average knitter out there, not a designer or someone particularly expert in pattern language. Myself, I try to maintain a pool with a mix of skill levels, although I do ask that my testers have some experience knitting toys, just so that they’re not completely lost with a pattern. Like my tech editor, most of my testers came to me, although sometimes I recruit testers from people who have contacted me about a problem that they’ve had with one of my patterns. If you’re looking for testers, a great place to start is the Testing Pool group on Ravelry. (By the way, I have all of the testers I need for now, but I’ll get the word out when I’m looking for more!)

You can make a great case for paying testers just like you would a tech editor, but for me, it’s important that my testers have the role of fan instead of employee. Everyone who tests patterns for me is doing so only because they wanted to be part of Team Mochimochi—I love that! And the many hours that my testers put into testing means that they would have to be paid very little for their work, and I’d rather that they enjoy the knitting in itself instead of being distracted by how much I’m nickel and diming them. That said, I send my testers another pattern of their choice once the test is finished, but I like to think of this as a “thank you” pattern rather than compensation for the work.

Final thought to this mostly image-barren post

My tech editor and testers do more than find errors in my patterns: they make me see my designs from a new perspective. They make suggestions about different techniques that I can incorporate (often introducing new techniques to me in the process), and they make me question the way I present those techniques. Even if I’m not going to make fundamental changes to a design once it’s in the tech editing/testing stage, I keep the feedback I receive in mind when I’m going forward with future designs. The whole point of writing a pattern is so that others can follow it, so it makes sense that it should take a team to develop that pattern. Go team!

Previous posts in this series:

Online Marketing and Social Media

Writing Books

On Being Burnt Out

Self-Publishing Patterns

How I got Started

Shop Talk: Online Marketing and Social Media

You may have noticed that I released a new pattern collection yesterday! Even though I’ve been doing this for seven years, pattern release day is still exciting. (Especially when the new pattern is listed for $600 for a few minutes because some extra zeroes got thrown in at some point…) I can’t wait to see what the initial reactions to a new design will be. But I can’t get reactions if nobody sees my new design, right? So that’s today’s “shop talk” topic: marketing and social media!

shoptalk5

Terms like “marketing” and “social media” can sound like bad words if you’re thinking about the worst examples of both, like spammy emails and obnoxious Twitter accounts. But they’re necessary skills for anyone running their own business, and, done right, they can be fun and not annoying. I’ve actually always felt a little drawn to marketing—when we were assigned to come up with ad campaigns for toothpaste in 5th grade, I couldn’t have felt more in my element. (A job where I come up with jingles for toothpaste all day would totally be my second choice for a career.) That was toothpaste, but finding ways to let the world know about my designs, which I’ve poured so much of my own passion and work into, is even more fun and exciting (and also a little scary.)

For any small business, your marketing style should fit the personality of your business and yourself, and should speak to your potential audience. Myself, I want to reach knitters of all ages (not only moms and grandmothers, but college-aged knitters and men too) who might be open to knitting silly, impractical creatures for themselves and for kids. So I strive to make my messages humorous and fun, with a tiny bit of an edge to keep things from being overly sweet. This style affects not just the newsletters and ads that I put out, but also all the photos that I shoot and the descriptions that I write for my designs.

Let’s take my new Tiny People 2 pattern collection as an example. After I had designed the tiny people and had written the pattern, I thought about what my main visual for the pattern should be. For my first Tiny People collection, their different little outfits had reminded me of The Village People, and thus, a disco party.

tinypeople_avail

For my second Tiny People set, I pictured them again standing in a row… police lineup!

tinypeople2_announce

That turned out to be the simple concept that formed my slogan for the patterns: “So cute, it’s criminal.” Do I really need to come up with slogans for my patterns? Of course not. Do I just like the idea of a silly slogan that might make someone groan or giggle (or both)? Yes indeed, and my dumb slogans fit with the fun and silliness that I aim for in my marketing and also give me a marketing focus and a specific “message” to project.

My image and slogan were a starting point to base my outreach about the patterns on, and I tweaked the delivery a bit for each venue. Once I had added the pattern to my shop and I was ready to let the world know, here’s how the marketing blitz yesterday went down:

Email Newsletter This is by far my most effective marketing tool. Everyone who is signed up to receive my newsletter did so voluntarily (either on my website or at an event), so they are already interested in my designs, and this email will reach them directly, in their inbox. If you have a small business, having a newsletter for people to sign up for is a must. I use Mailchimp to send my announcements, which I like for its clean look and well-designed website. It’s not the cheapest option, but for me well worth the monthly fee. I try to keep my newsletters pretty short and sweet, with lots of visuals and extra goodies for people who scroll to the bottom.

tinypeople2_newsletter
(Click on the above to see the full newsletter.)

I don’t want my newsletters to only be about selling stuff—instead, I think of them as a tool for keeping the mochi-knitting community alive. So I always include news about other stuff going on in the Mochimochi world, like this blog series, and often also a photo of a toy that one of my customers has knitted. I use a first-person plural voice for these newsletters, because I want to emphasize that it’s not just all about me—John is a HUGE behind-the-scenes part of Mochimochi Land!

Ravelry Listings It seems like alllll the knitters in the world are on Ravelry—of course that’s not really true, but it’s by far the biggest website referral for me, so it makes sense that I prioritize it in getting the word out about my designs. Just by listing the patterns on Ravelry, I’m getting my designs in front of lots of knitters who haven’t seen my work before. Plus, I can also see what kind of attention my designs are getting. (Of my four new tiny people, the Tiny Lumberjack is definitely getting the most love by Ravelers.) I’ve learn a ton by checking the user activity tab for my designs.

Ravelry Ads This is pretty much the only actual advertising that I do. With the Ravelry group forum banner ads, I can be so incredibly specific about who I want to reach (toy knitters, knitters who love Doctor Who, NASA knitters), that it’s very much worth the $1.50 per 1,000 clicks. And with this type of online advertising, I can set a budget and make adjustments to the forum selection as I go, so it doesn’t feel like I’m just blindly paying for ad space.

tinypeople2_ad

Facebook Here’s a website that’s changed a lot since I started using it for my business. I may have more than 6,000 “likes” on Facebook, but these days only a tiny fraction of that see each of my posts. So the idea with Facebook is to try to post things that will get actively shared on the site, and I’ve found that images (not just links with thumbnails) are the most effective way to get this to happen. At the same time, when I think about my personal Facebook use, I know that one of the main reasons that I ever “unlike” something is when they’re constantly posting stuff in my feed. So I try to keep my Facebook posts visual and relevant.

Twitter I have a smaller following on Twitter, but it suits me a little better as a user. I like that it has a more casual, conversational feel to it than Facebook, and I feel more comfortable posting multiple times a day on Twitter. Of course, it’s less visual and there’s the character limit, so things have to be concise and well worded. It might be a less effective marketing tool for me, but I just like it more personally, so I spend more time there than any other social media website.

Blog The weight that my blog has as a marketing tool has changed a lot in recent years—fewer people are using RSS feeds (which let them automatically see everything I post) and more people are using social media (where I have to actively post and try to get people’s attention). But my blog is still really important as a community hub on my website—it’s the “voice” of my website. So a blog post about my new patterns is a chance to be a little more chatty about them, to share some behind-the-scenes images and thoughts on them. My blog post yesterday was a pretty straightforward announcement, but I can follow up with more fun posts that reveal more about my new characters’ personalities, or maybe that share images of lumberjacks and astronauts that other people have knitted, etc.

Pinterest A confession: I don’t really enjoy Pinterest. Every time I pay it a visit, I am inundated by an infinite stream of images of beautiful things that I could be wearing, cooking, crafting, reading, watching, painting… it’s just too much for me, and I end up in a spiral of mild self-loathing. BUT I realize that Pinterest is hugely popular for good reasons, and people respond well to my images there. So I use the little “Pin it” button that I have in my browser’s bookmarks bar to post my photo from my blog post (making sure that the link will refer directly back to the specific post about the new patterns), and that way I can have a Pinterest presence without ever visiting Pinterest. (Although I do visit the site from time to time just to see what’s going on there and how my images are being received.)

pinterestmarketing

Flickr I also don’t spend a ton of time on Flickr, but it’s another highly visual website where people I might not otherwise reach may take notice of my designs. After posting photos on my photostream page (which appears to be temporarily broken as I type this), I add them to knitting and other crafty groups so that others might stumble upon them. I don’t usually include a link to the item page in my description, though, because Flickr discourages people from using it as an advertising tool, which I think is great. So I use it more as a general way to reach new people—if they are interested enough in my designs, they can still easily find my website to purchase the patterns.

Of course, there are so many other social media sites that I could be using, but with all the options it’s important to prioritize the sites where I think I’ll be more likely to find my audience and sites that I enjoy using. I’m certainly open to changing my marketing approaches as the internet changes, though, so I try to keep more or less up with where people (especially knitters) are spending their time online.

My takeaway tips for other small business owners: know your audience, know yourself and your style, and keep it visual and personal. The right audience will share your passion about your work, so it’s worth it to actively seek them out and then be active about maintaining the relationship. No spam necessary!

Previous posts in this series:

Writing Books

On Being Burnt Out

Self-Publishing Patterns

How I got Started

Shop Talk: Writing Books

I wanted to thank you all for the supportive comments you left on my post from last Friday. You guys are the BEST. To try to get rid of the blahs I took a couple of actual days off from work over the weekend (a rarity for the self-employed), and just that made all the difference. And now I’m also far enough behind on projects that I don’t have a lot of choice but to get in gear, so things are busy—in a good way—again. It’s like the new year officially started for me this week. (Gung Hay Fat Choy!)

shoptalk4

Today I’m going to talk books. Writing them has been a big part of my life in recent years—I’m working on my fifth right now, if you can believe it! Of course, writing a book is easier than it’s ever been with the self-publishing options that are available these days, and that can be a super way to go if you have an idea that you can’t wait to make happen. But my experience writing books has always involved working with a publisher, which means working with a team of professionals (editor, art director, designer, marketing team, and more) who bring experience and expertise, but who may have different ideas from me about the content and marketing of the book.

There’s definitely something legitimizing about getting a book published. After my first one came out, my parents stopped subtly asking me when I was going to get a “real job,” for one. But books don’t pay the bills for most designers. For me, they do a lot of things: they’re a fun opportunity to take my design work to a new level; they supplement my income; they open doors of opportunity; and there’s just something wonderful about having a professionally published book in my hands with my name on it. It never gets old!

advancecopy1

I love talking with other authors (mostly other designers) about their experience with publishing. It’s different for everyone: some authors write a new book annually, and some try it once and say “never again.” For me, because there are so many changes happening in publishing, and because I already have my own business selling patterns independently, I like to reevaluate the situation every time before I send a proposal to my editor and before signing a new contract. Is this is the best way for these designs to go out into the world? I ask myself. You could argue that if I released all of the patterns from a book individually as PDFs, I might actually make more money off of the designs, since I would be getting $5 or $6 each time someone purchased a pattern, instead of about $1 each time someone purchased a copy of my book. But I know that working with my publisher means that my books will reach thousands of people who would never have otherwise found my website. They even reach people in languages that I couldn’t. (Yes, I could hire translators for my patterns, but then I’d have to have whole new websites to host those patterns if I really wanted to reach customers in those languages.)

Putting all the numbers aside, in my experience the best things about writing books are getting to think about my designs in a new way and getting to work with talented people. With my PDF patterns, I can think of an idea on a whim, and have a finished pattern up for sale a month later. But with a book, it’s a much bigger, longer process. Just figuring out the concept of a book is a challenge: the projects should all fit into a larger theme and style while also each being able to stand alone, and there needs to be some specific reasoning behind why the book should even exist in the first place—the publisher has to agree that it will get noticed on bookshelves. I get feedback from my editor and my testers as I’m developing the designs, but even after the manuscript is finished and the photos have been shot, it’s another year before the book is published and I see what everyone else thinks about it. It’s not easy to work so far in advance! But I think it’s made me a better designer.

It’s a privilege to work with a team of talented people who are enthusiastic about making something good together. I have enormous respect for the editors I’ve worked with—they have a perspective on DIY publishing that I’ll never have, and they are the ones who give me guidance when I need it and advocate for my ideas on their end. And working on a book means that there is a budget for fancy photography, and I’ve been lucky to work with fancy photographer Brandi Simons on all of my books. (I’ve blogged about working with Brandi many times over.) Then, seeing how the designer does the layout of the book (a process that I’m way less involved in than the photography) has pushed me to get more creative with images and design on my website and in my PDF patterns.

ttmm_gnome2

On the other hand, I’ll add that one of the disappointments I’ve had is not getting total control over what the final book cover looks like. I can give as much input and suggestions as I like, but the final decision on it is very much not up to me.

At this point, I would love to give a detailed account about how hard I pounded the pavement to get my first book published. Instead I got lucky: in 2008, before I had even seriously thought about writing a book, I got an email from an editor at Watson-Guptill asking if it was something I had considered before. (Later on Watson-Guptill’s craft publications were moved over to Potter Craft, so that’s why my first book is under a different imprint than my other books.) She had seen my toys online somewhere—Craft magazine, I think—and had followed a link to my Flickr page, where she could see that my photos of my toys had been viewed a lot. So my key to getting a book deal was having my work already seen and liked by others online. I was no knitting celeb, but I had already established my style and “voice” online, which made it easier for this editor to imagine what a book of my designs might look like. But I still had to write a proposal and get it approved by multiple people before it was a done deal.

Most people won’t be so lucky as to have an editor reach out to them first, but even without that I don’t think it’s so hard to get your proposal in front of an editor. I’ve heard that an agent is essential for publishing in fiction, but in my experience, DIY and craft publishers are open to unsolicited proposals; often, there will be information on their website about how to submit. There are plenty of online resources that will tell you will should go into a book proposal, but I’ll go over that anyway, just for fun.

• A paragraph-long synopsis This should include an explanation of what the book would be about and who the target market is. It’s that crucial first impression, so it should be succinct and compelling!

• A table of contents Even if most of the contents are patterns, there needs to be more to it than that: how are you going to introduce the concept of the book and present techniques? Do you have any extra goodies to include that will make your book special?

• Sample patterns These can be existing patterns that you’ve already published, but should be in the style that you would like to see published in a book. Include images and captions—everything you would like to see in the final book.

• More sample images These should include images of other projects similar to those you’d like to put in the book. If the photography isn’t in the style that you envision for the book, be sure to include more samples that represent the style you’d like (will the projects be shot in nature? in a studio?). Also specify whether you have a photographer in mind to work with, or whether you’d be doing the photography yourself. One more thing for this section: include the number of photos and other graphics that you think you’d need.

• A detailed market analysis This section should explain who your book is for, and what would make your book stand out from all the others that are currently on bookshelves. Are there similar books already out there? If so, that can be OK—it might just mean that it’s a popular topic. But you should have a compelling reason that your book would be different, and would appeal to people who may already own those other books.

• Biographical information Your bio is part of the whole package. You don’t have to be famous, but you should have an interesting story about who you are and what your background is. Include any press you might have gotten, and info about what kind of online presence you have: how many monthly visitors your website gets, how many followers you have on various social networks, etc.

• A projected delivery date This is the date by which you think could turn in a finished manuscript and all of the photography and graphics for the book. Be sure to allow for the fact that you’re probably not going to start writing it tomorrow, unless you’re already in the process of writing.

That’s a lot of stuff! But going through the process of writing a book proposal is a great way to clarify your own vision of what the book might be, and it can also help you figure out if you really want to be writing this book at all.

To sum up with my advice to budding designers with a book idea: If you’ve never shared your work with an online audience, now is the time! Ravelry is a fantastic place to get feedback on designs and get noticed. As scary as it is, seeing how others react to your work online will help you develop your ideas, and that online audience will also make you more appealing to an editor. If you’re already self-publishing, be sure to think about the short and long term benefits of self-publishing versus working with a publisher. For me, I’ve managed to strike a balance between working on books (which can take up about half of my year) and working on designs that I release as self-published patterns and kits. I love being able to have it both ways. And as much work as it is, writing books has been one of the most fantastic, rewarding experiences that I’ve ever had.

Also, books led to this happening!

ttmm_martha

Previous posts in this series:

On Being Burnt Out

Self-Publishing Patterns

How I got Started

Shop Talk: On Being Burnt Out

shoptalk3

I was going to talk about writing books today—I actually had a post about 80% finished—but then I decided to instead address something that’s going on with me right now: I’m kind of burnt out. The second half of 2013 was so intense with projects, travel, and our move to Chicago, that I had to scrounge up energy from reserves that I didn’t really have, and now I’m paying the price a bit this January. I haven’t melted into a depressive puddle on my couch (although I do happen to be on my couch right now), but I am lacking some of the excitement and creative energy that I rely on to keep going.

This kind of feeling used to make me panic (what if I never want to make something again? Do I have to give up and just get a real job??), but getting burnt out is not the end of the world. It happens to me about once a year after finishing a major project like a manuscript or an art show, this feeling that I’m not terribly excited about much, and the thought of big projects makes me want to get back in bed. It’s not a good feeling, and it FEELS like the kind of feeling that won’t go away, but it always does. It just takes time, and that’s the frustrating part: you can’t force inspiration or excitement.

campy1

When I was a senior in college, I was accepted into a Fulbright program to study in Japan for the following year. Unlike most Fulbright grants, this one wasn’t for research toward a graduate degree, but just a year of free academic study. (How great is that?!) Because I’d changed majors halfway through college, I was working on my thesis right up through August, and the program started in September. I recall turning in my thesis and feeling giddy about going to Japan. Then when I got to Japan and we were having our orientation for the coming year of study, I realized that I had zero interest in 12 more months in libraries reading about and watching Japanese wartime films. (That was my chosen area for some reason.) We were going around the room talking about what we planned to do with our year, and when it was my turn, I decided to be honest and say that I had just turned in a thesis two weeks before, and I wasn’t really feeling terribly academic right now. To my relief, the program director reassured me that it was common to feel sapped after such a big project and I shouldn’t worry about it—I should just relax and let myself recover. To my surprise, he then said that it could take months, or maybe even a FULL YEAR, to feel inspired again, and that that was OK. (Seriously, how great was this program?!) So I took him at his word and signed up for flower arrangement classes. And eventually I was motivated to write a big paper about leftist filmmaking in the 1920s, or something.

Academia turned out not to be my life’s passion, but I know that I’m passionate about making things with my hands and creating characters and stories. I’ve been doing this long enough that I no longer question whether I’m cut out for the job that I do, and it’s OK to just let myself enjoy other things for a bit. I stayed a little longer than usual in my pottery class the other day, and I’m planning to go in for some extra studio time soon. This is also a good time for me to catch up on some of the more mindless tasks that come with my job: winding yarn for kits, updating my mailing list, etc. I am also continuing to work on designs (I’m looking at YOU, unnamed arcade toy), but maybe I don’t have to write an entire book chapter this week if it makes my head hurt to think about.

My aim with this post is not to complain, but to get my thoughts down so that I can eventually move on. And I also think that, while the creative parts of the internet can be inspiring, they can also make us feel like if we’re not being inspired every second of our lives, there’s something wrong with us. Not true! Downtime is part of the creative process. Let it be. Maybe go to a museum, or take up flower arrangement.

Previous posts in this series:

Self-Publishing Patterns

How I got Started

Shop Talk: Self-Publishing Patterns

Thank you for all the comments to last Friday’s inaugural Shop Talk post! Sometimes the thing that stops me from talking about how I run my design business is the idea that I ought to have actual wisdom to impart, but I also understand that it’s helpful just to hear about someone’s personal experience, even if they’re not so wise.

Since last week I wrote about how I got started, I thought I’d take this week to go into more detail about what exactly it is that I started. I bet many of you are familiar with the basics of how independent knitwear designers (or notwear designers, in my case) make a living: we knit up something lovely, we write up the instructions on how to make it, and then we sit back and watch the money pour in as thousands of knitters buy the PDF pattern as a download. Right? Well, not entirely wrong, but it’s not so simple either.

shoptalk2

For the curious, here’s a step-by-step breakdown of what goes into my pattern making process.

1. THE IDEA
I have an idea for a toy. If it’s something that I’m excited about knitting and something that I think other people might want to knit too, I get started on the design. (Occasionally I also do a search on Ravelry to make sure there isn’t something too similar already out there.)

2. THE DESIGN
Design time! The time involved in the design process can vary wildly, from hours to weeks, depending on size, complexity, whether I have to start over a few times… a while back I wrote a more detailed description about what goes into designing a toy.

monkeydesign

3. THE PATTERN WRITING
Once I have a finished toy that I’m happy with, I start writing up a proper pattern using the notes that I took as I was making the toy. Like the design process itself, this can take hours or days, depending on the complexity. (I do refer back to my older patterns for wording, but I also strive to always be making my instructions as clear as possible, so I still find myself struggling with how to best describe techniques that I’ve been using for years.) As I type up the pattern, I make notes to myself about which parts should have a photo illustrating a particular step.

4. THE RE-KNITTING
Once I have the basic pattern written up, I also have a list of additional things I need to knit for the photos that will go in the pattern. Depending on how many steps need photos, I might be re-knitting parts of the project two or three times over to show different techniques. (I like to have all the materials ready for the photo shoot, instead of stopping along the way to knit and take actual process photos. Although sometimes I’ll go in reverse, shooting a later step, then ripping it back to an earlier step for the earlier photo.) I also often make an entirely new toy using different colors or some other variation. Because variety!

5. THE PHOTO SHOOT
Photo time! In addition to the step photos, I take white-background photos of the toy from multiple angles—it’s always better to take more photos than you think you’ll need rather than realize you need more and have to set everything up again. Speaking of setting up, here’s what my setup looks like, more or less.

lightscamera

(If I look sweaty and disheveled in this photo, that’s because those lights are hot! And I’m usually just naturally disheveled.) I use a tripod and my camera’s timer to take photos that involve both of my hands, like this one.

bears_fuzz

I also try to take other, more fun photos in natural environments. It’s interesting how some toys are so much easier to shoot out in the world than others!

gnome_clover

6. THE PHOTO EDITING & PATTERN FORMATTING
The photo fun continues as I use Photoshop to adjust what I’ve taken (including erasing the backgrounds) and insert the photos into the pattern. I also play around a little with page layouts at this point, trying to get to as close to a final pattern as I can. There are lots of different software options for this, but I’ve found Word, despite its shortcomings, to be easy to use and just fine for my patterns.

samplepattern

7. THE TESTING & EDITING
Now that I have a pattern, I send it out to my testers and my tech editor. This is a crucial step, because no matter how many times I closely read over a pattern, I can miss little errors. And instructions that seem natural to me may be baffling to someone else who isn’t living in my head.

8. THE FINAL EDIT
The feedback from testers and tech editor is in, and I make the final edits to the pattern. Final pattern achieved!

9. THE RELEASE PREP
Now it’s time to begin the process of releasing the pattern out into the world. I go back to all those photos I took in Step 5 and reformat some of them as images to use on my website (homepage, shop, and blog) and Ravelry ads (if I’m going to advertise).

luvbotsad

I also write up descriptions to use on my blog and email newsletter.

10. THE RELEASE & PROMOTION
On release day, I start by uploading the pattern to E-Junkie, my download service, and I get the button code for my website. Once I’ve put the pattern up in my shop, I list it on Ravelry, then I start the announcements: newsletter is first, then blog, Facebook, Twitter, Pinterest, Flickr…. there are probably more that I should be using, but that’s enough for me!

11. THE RESPONSE
Now I wait and see what kind of response I get. There are usually a few questions from customers that come in when I first release a pattern. And the first week that I have a new pattern out, I’m often on Ravelry, checking to see if any projects have been listed. It’s always exciting to see the first one!

So that gives you an idea of what goes into releasing a pattern: a lot of time invested up front! Most of the time I seem to have two or three different patterns in development at once, each at a different stage. (Right now I’m at Step 2 and Step 6 with two projects.)

And of course, with all that, there’s no guarantee that a pattern will be successful—after doing this for seven years, I’ve gotten only slightly better at guessing what will be popular with knitters. Getting a pattern noticed is it’s own process that I’d love to go into more detail about in a future post.

But if any of you budding designers are wondering if it’s worth all the work, for me it’s worth it when I get to see this:

boo2012

To date, there are 950 Boos listed on Ravelry, each one of them unique and awesome. Getting to see my idea realized in someone else’s hands is simply the best part of this job.

Previous posts in this series:

How I got Started