
This post was originally published as a guest post on Whipup.
In my job as a designer, there is nothing more exciting than dreaming up a new knitted toy and then seeing it multiply in different variations in the hands of knitters all over the world (through photos that they post on Flickr and Ravelry). Between the idea for a character and its wildly diverse speciation, though, is the complex process of creating the design and the pattern.
I was just about to begin designing a new knitted toy when Kathreen invited me to write a guest post on my process, so I documented the steps as I went, having no idea how it was going to turn out in the end. So without further ado, let’s make a monkey!
Sketching is the starting point for me, both when I have something specific in mind to design and also when I just need to get ideas flowing in a general way. I’m not much of an illustrator, and I’ve never used a proper sketchbook, but I’ve found that making this part of the process as low-fi and homely as possible helps me be free with ideas and make new discoveries.
I already know that I want to make a monkey, but what kind of monkey? I sketch a new concept over and over again until it takes shape in a way that clicks with me. I always try to include a fun design detail, so I experiment with different props and features.
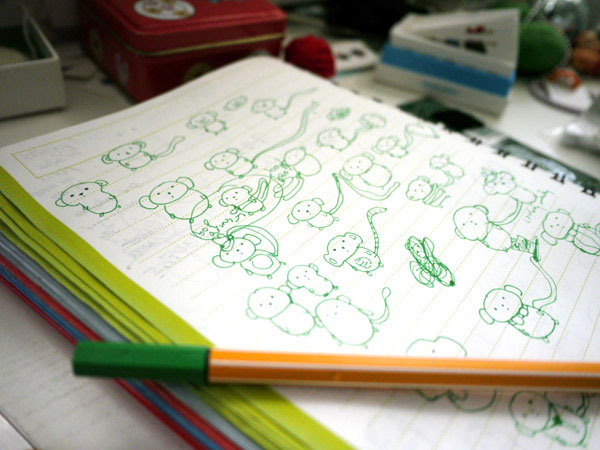
I’m thinking I want to give my monkey an extra-long tail to play with, maybe finding a way that he can grab on to his tail with his arms – I circle the monkey that’s closest to what I want to execute, and then I go on to sketch him in more detail.
If the pattern has a specific design element that needs a little math or engineering, I work it out in a general way at this point. This monkey will probably consist of basic shapes, so it will be more about getting the proportions right as I go and less about deciding at this point exactly how many stitches I will have on my needles or how many rows I will knit.
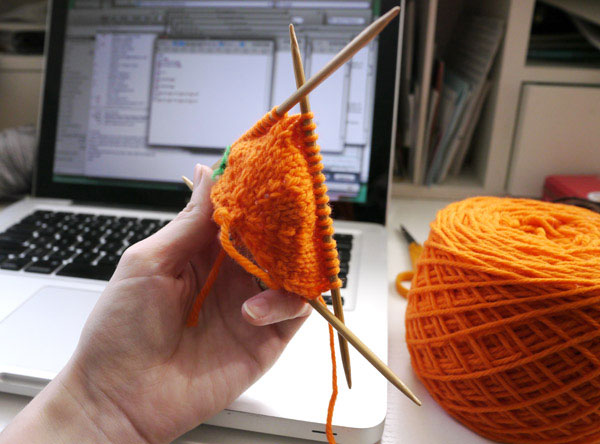
Color choice is important to the personality that the final toy will have. Will it be more natural and subdued, or cotton-candy-like and silly? I decide to go with a bright orange as the main color – it’s fun, but still somewhat rooted in nature. I often end up knitting different color variations in the end, so I try not to obsess too much about colors at this point.
Unless I’m planning an especially large design, I like to jump right into knitting the main body piece. I’ve spent the past five years designing my characters out of basic shapes (balls, tubes, triangles, and the like), so I already have an idea of what ratios of stitch increases and decreases I should use to get the shapes I want. I like to work my designs from the bottom up, both because I find it easier to shape them that way, and also because decrease stitches look nicer than increase stitches at the top of a toy’s head. So here we have a monkey butt.
As I knit, I note what I’m doing round by round on a text file on my computer. I use a shorthand at this point that’s just for my own reference.
I’d like to add a yellow patch to the monkey’s tummy, so I experiment with adding colorwork, using Illustrator to plan out a chart.
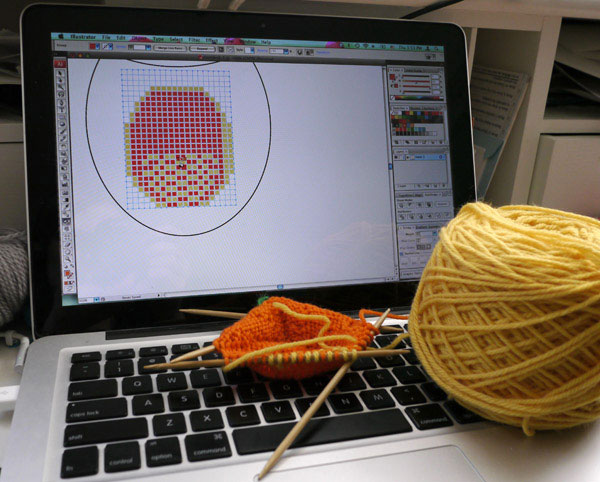
…But I decide the colorwork isn’t the best fit for this pattern, so I scrap this plan and go back to where I was.
As my monkey takes shape, I occasionally check the progress by stuffing it and comparing it to my sketches. I’m not looking for a perfect match – sometimes I find that my yarn and needles do something better by chance than I had originally planned. And often I keep going even if I’m feeling uncertain, because it’s hard to tell at this point what it will look like as a finished piece.
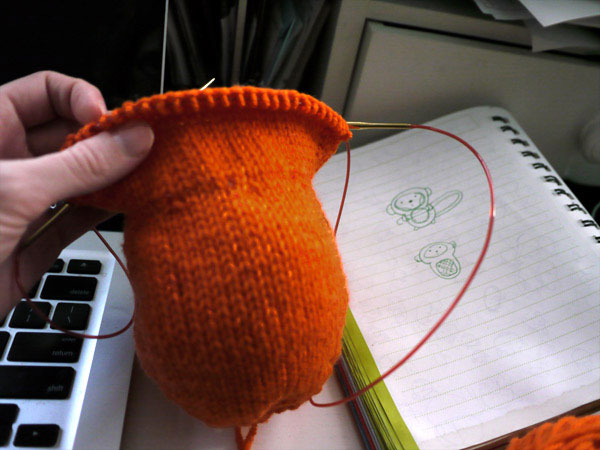
I’ve also switched from using double-pointed needles to a circular needle, which makes it a little easier to see how the piece is shaping up.
After finishing the body, I move on to the rest of the body parts, using the body as a reference point for getting the other shapes and proportions right.
As I make all the other parts, I pin them in place and begin stitching some of them, but I wait to get everything assembled before finishing the stitching and weaving in all those loose ends, so I can more easily make adjustments.
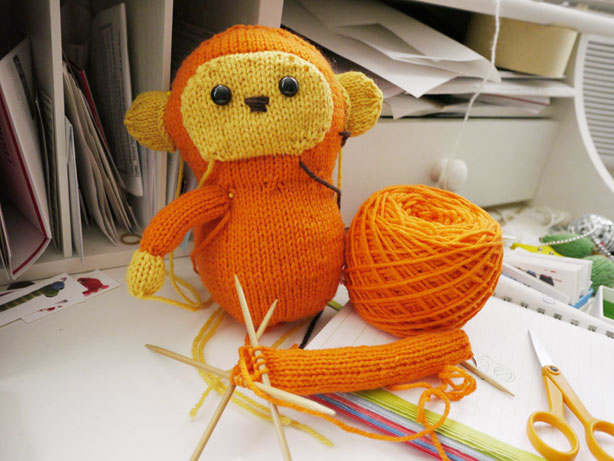
I think I should mention my extremely messy desk – I used to try to keep it neat, but I find that I’m more creative and happy when surrounded by lots of colorful randomness!
At the last minute, I decide on a different arm position, which will also affect the way the tail works with the body.
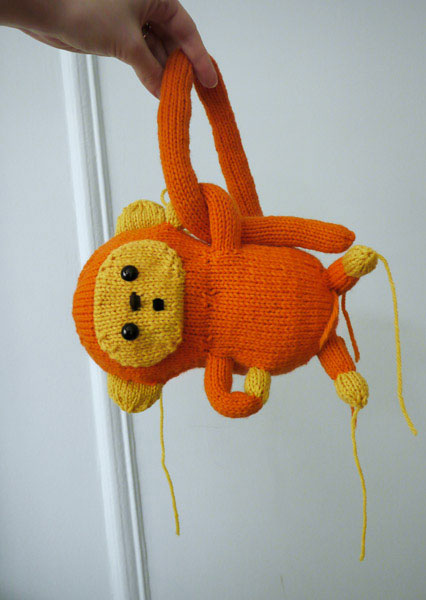
I finish weaving in all those loose ends, and my monkey is done! At this point, I’m so excited for my new little friend that I want to take some pictures with him in the park. This one may or may not end up as the “beauty shot” in the pattern, but photographing my monkey helps me get a sense of his personality and might inspire a name.
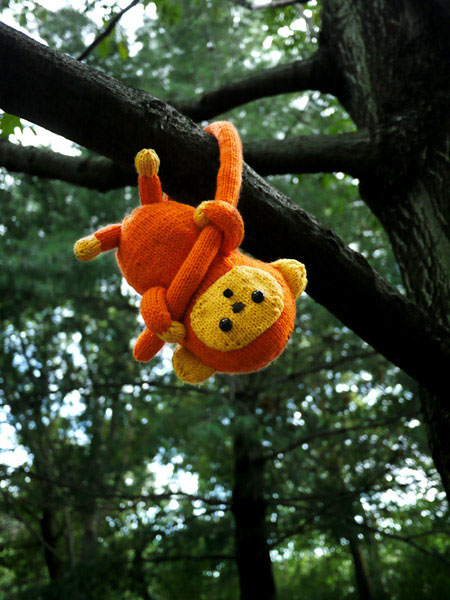
Looking at this photo makes me decide that I should knit up a second monkey so that I can show the front and back of the design in one photo, while also featuring a different color combo.
My work is only about halfway done right now – I still have to edit my pattern notes into a readable, step-by-step format, and I have to take additional photos, including any necessary technique photos. Then I turn to my small pool of sharp-eyed test knitters, who point out errors and typos, help me word all parts of the pattern more clearly, and make suggestions for additional photos. And my monkey still needs a name! (Suggestions are welcome.)
All that is still ahead of me, so I’m aiming for a November release for this little guy, at which time the pattern will be available as a PDF download in my online shop. Then if I’m lucky, a few days or weeks after that, I’ll get to see some monkey cousins pop up online!