This is a simple technique that I use in many, MANY tiny knitting patterns to make arms, legs, horns, antennae, and all other manner of tiny appendages quickly and easily. It’s ideal for any skinny shape that needs to poke straight out of a creature.
Use this technique after you’ve finished and stuffed a body. I recommend using slick polyester stuffing for just this technique, so that the I-cord can slide smoothly through the inside of the body.
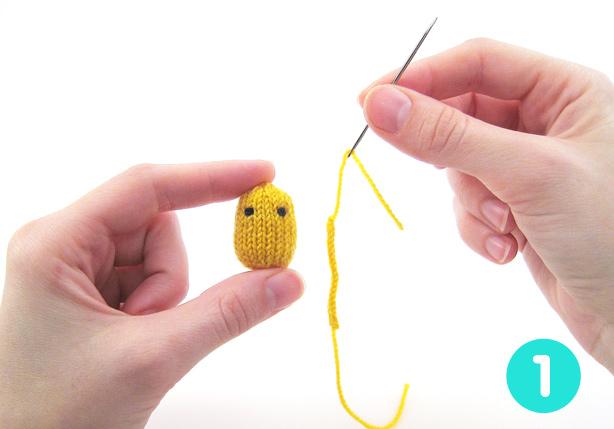
1. After finishing the body, you’ll make an I-cord with a length according to the pattern instructions. Leave a tail of a few inches when you cast on for this I-cord, and finish off the I-cord by cutting the yarn (leaving a few inches again) and weaving that tail through the live stitches. Leave the tail on the tapestry needle.

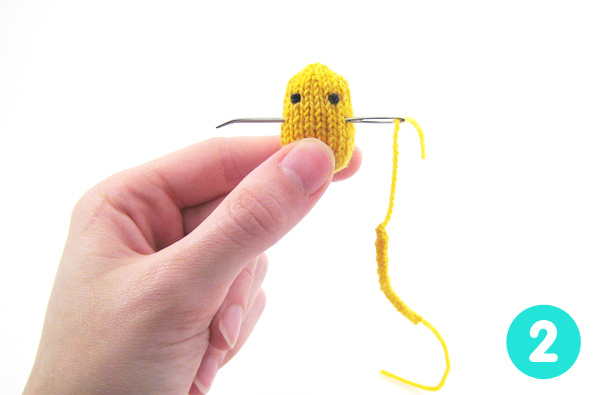
2. Use the tapestry needle to guide the I-cord through the main piece. (I recommend embroidering the eyes first, so that you can use them as a guide for placing the I-cord.) Make sure not to split the stitches as you insert the needle.

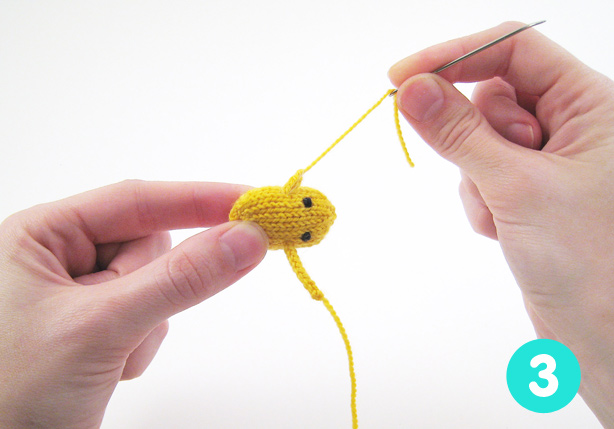
3. Gently pull the tip of the I-cord through the body. If you do it slowly, and if the body isn’t stuffed to tightly, it should glide through easily. If you’re having trouble, remove the needle and try re-inserting it.

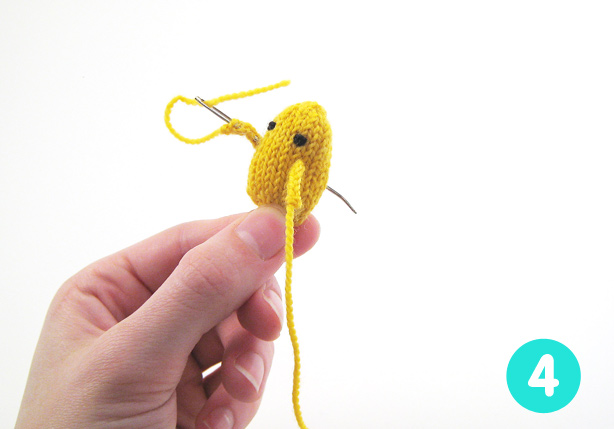
4. Pull the I-cord halfway through the piece, so that an equal length is now sticking out from either side. When you’re happy with the placement, use the needle to weave the tails back through the I-cord and through the body. (Don’t worry about making the tail go through the exact center of the I-cord—if you make some small stitches to reach the body, that’s fine.) Loosely weave the tail in and out of the body a few times to secure, then trim the ends.

If you’ve woven the tail through several times, the I-cord should be pretty secure! If the toy will be played with and you’re concerned about the I-cord coming out from little hands tugging on it, just make sure to make some extra stitches inside the piece and near the I-cord ends so that it’s extra secure.
