
Knitting with double-pointed needles, or DPNs, is an excellent way to knit 3-dimensional toys with minimal seaming. The needles, which are usually used 4 at a time, take a little getting used to, but it’s really less complicated that it looks! This tutorial will show you the DPN basics when knitting toys.
Using DPNs with a large number of stitches
If you haven’t used DPNs before, start out by practicing with a large number of stitches.
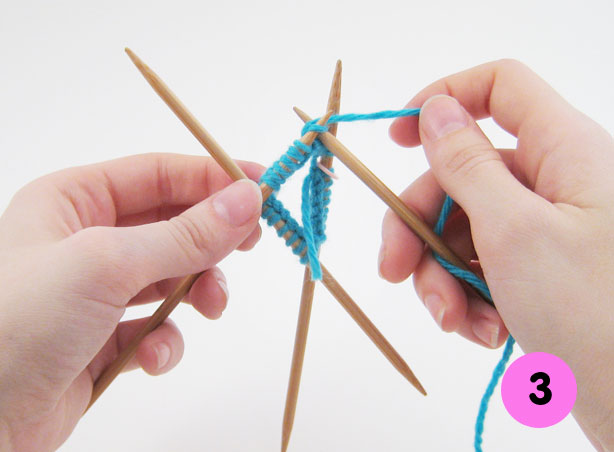
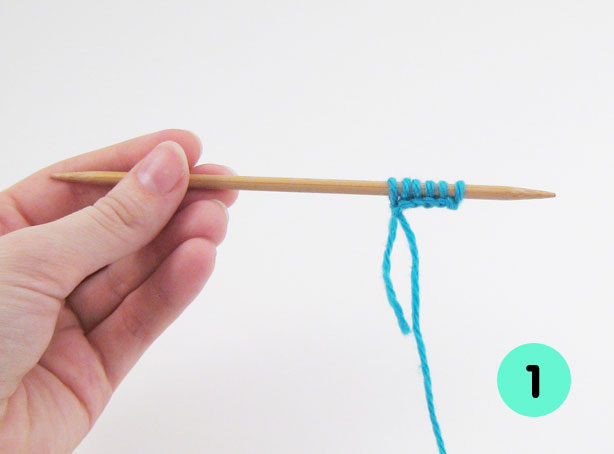
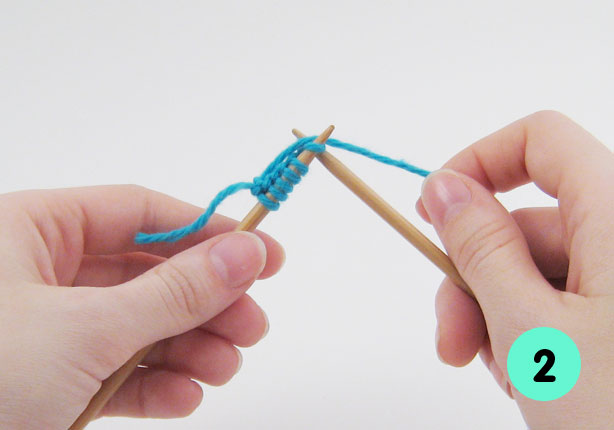
1. Cast all of the stitches onto one needle. Then, distribute the stitches onto 3 needles by slipping some of them purlwise onto 2 more needles. Hold the needles so that the yarn is attached to the needle on the right and lies behind that needle, and all of the stitches are aligned on the inside of the needles.
2. If you will use a stitch marker to keep track of the beginning of your rounds (I recommend it), then place the marker on the right needle, next to the stitch with the yarn attached. For this first stitch only, knit directly from the left needle to the right, joining the stitches together into a round as you do so.

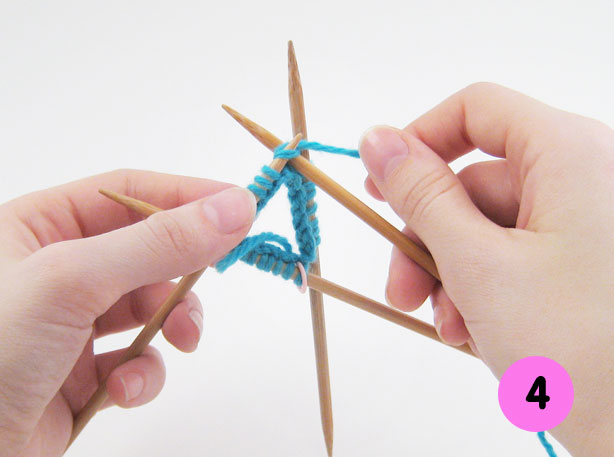
3. Next, pick up a fourth needle, and use it to knit the stitches on the left needle. Just let all the other needles hold the stitches that are on them, and concentrate on knitting with the two needles.
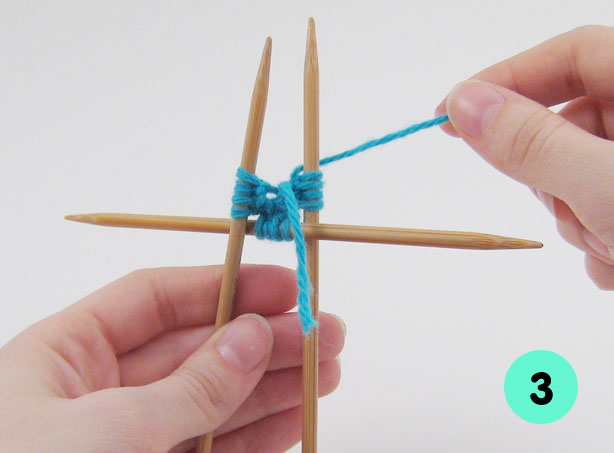
4. When you finish knitting all of the stitches from the left needle onto the fourth needle, push the stitches to the center of the needle so that they won’t slip off, and rotate all of the needles clockwise just a bit. To continue, use the now-empty needle to knit the stitches from the next needle in the round, just to the left of the needle you finished with.
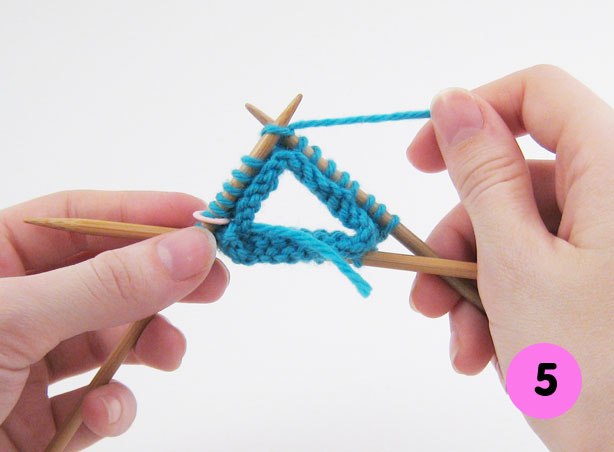
Notice that the stitch marker has rotated to the bottom. Continue to knit in this way until you reach the stitch marker—that indicates that you’ve just finished knitting one round.
5. Often a loose column of stitches will form between the needles because people’s tension is usually looser at the first stitch on the needle. (This is called the “ladder” effect.) You can avoid it by shifting the stitches around the needles every few rounds. Set aside the fourth needle, and knit two stitches directly from one needle to another. Once you’ve done this, pick up the fourth needle again, and continue knitting as before.
6. If you continue to knit rounds without any increases or decreases, you’ll see a tube of knitting form after a few rounds.
Using DPNs with a small number of stitches
Most toy pieces start out by casting on only a few stitches, so that there is no hole at the cast-on end.
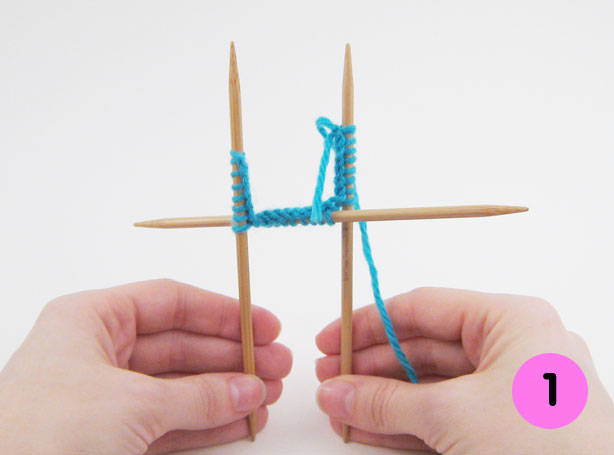
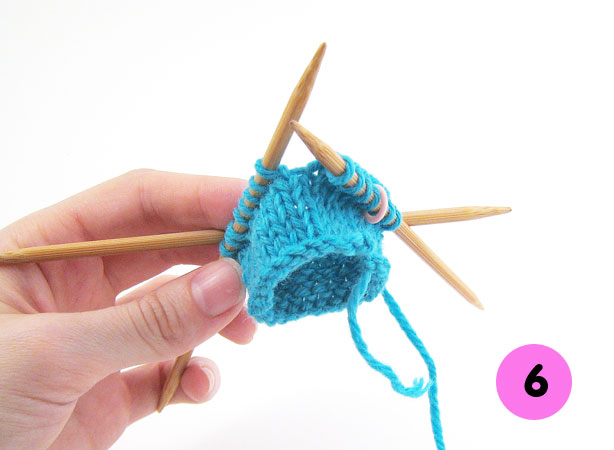
1. When you have to start out by casting on a small number of stitches, like for or six, you don’t have to put them onto 3 needles, which can make it difficult to keep track of what you’re doing. Instead, slide the stitches down to the right end of the needle, with the yarn attached to the leftmost stitch.
2. Next, pull the yarn tightly across the backside of the stitches, and knit the first stitch. (You are essentially making an I-cord.) Continue to work the rest of the stitches using just these two needles.
3. You can continue to work the stitches as an I-cord, sliding them to the right end of the needle after every round, for as long as is comfortable to you. The important thing is to pull the yarn tightly for the first stitch. However, you will usually increase the number of stitches in the first round, and once you do so, you can then distribute the stitches onto 3 needles and use a fourth needle to knit with.
Closing up
When you finish knitting a piece, often you will close up the stitches instead of binding them off.
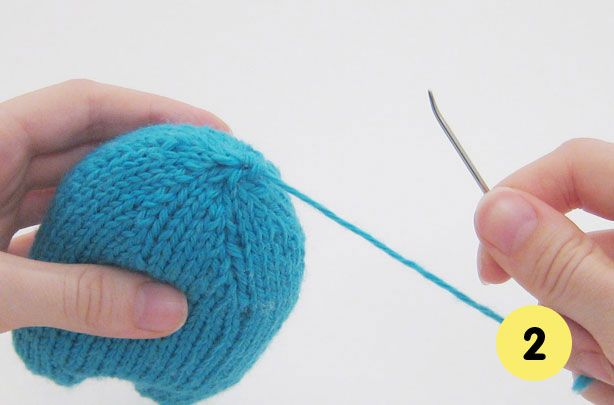
1. Cut the yarn, leaving a tail of several inches, and thread the tail onto a tapestry needle. Beginning with the first stitch in the round, insert the tapestry needle purlwise through each stitch in the round, sliding the stitches off the DPNs as you go.

2. Once you have threaded the tail through all of the stitches, pull tightly to close up the hole.
3. To finish, insert the tapestry needle down through the middle of the closed-up stitches, and then weave it loosely through the entire piece several times to make sure that it won’t come out.

I hope this tutorial has you knitting toys in no time!
While I didn’t need a tutorial, I always love seeing your clear photos. I really need to go and take some of my own drawings and turn them into toys.
This is really helpful! Thanks a lot. The pictures are very clear too.
I’m a very experienced knitter & still learned something new today; I love when that happens. I never thought about keeping the first few stitches all on one dpn before, it’s going to be a game changer. Great post.
Is that a size 1 knitting needle?
Glenys, I did this demo with worsted-weight yarn and size 5 needles.
lucky tara you can knit with dpns