
Many of my patterns for tiny people and other characters use the technique of joining legs together seamlessly into the piece. It’s a simple process, but one that’s best shown in a series of photos that I can’t normally fit into the space of a pattern. So here’s a tutorial on exactly how to do it.
This tutorial shows the technique using double-pointed needles, or DPNs. It’s also possible to do on a circular needle, but my preference is always to use DPNs when working with such a small number of stitches.
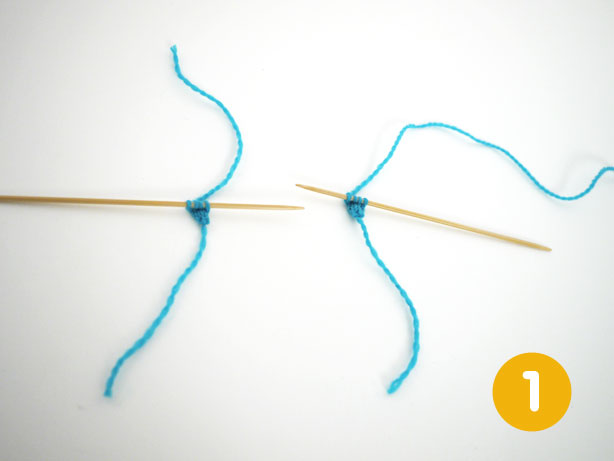
1. Begin by making one I-cord leg as specified in the pattern (usually a 4-stitch I-cord), then break the yarn and set the live stitches aside on the DPN. Make a second leg in the same way as the first, but without breaking the yarn. Now you have two I-cords, one with a tail of yarn and one with the yarn attached to the ball.
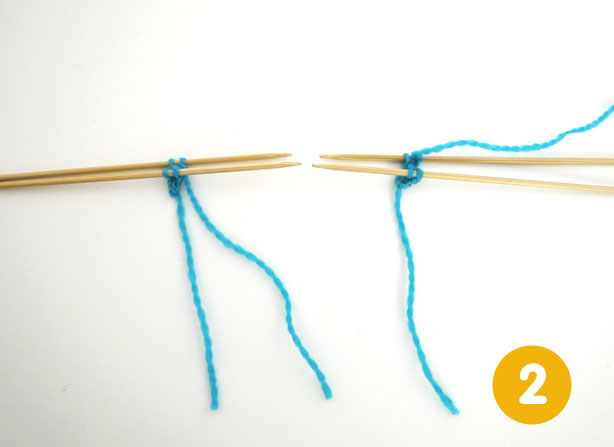
2. Next, divide the stitches of each leg onto 2 DPNs. Orient the DPNs so that the first 2 stitches of each leg are on the needle in front, and the last 2 stitches are on the needle in back, with the cut yarn/working yarn on the rightmost stitch on the back needle. The purl stitches of each leg should be facing each other on the inside. Place the legs so that the one with the working yarn attached is on the right.
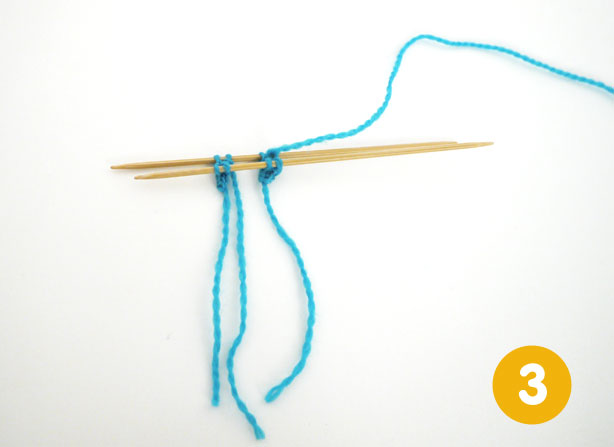
3. Transfer the stitches from the DPNs on the left onto the two DPNs on the right, so that the first 2 stitches of each leg are on the front needle, and the last 2 stitches of each leg are on the back. The working yarn should still be attached to the rightmost stitch on the back needle.
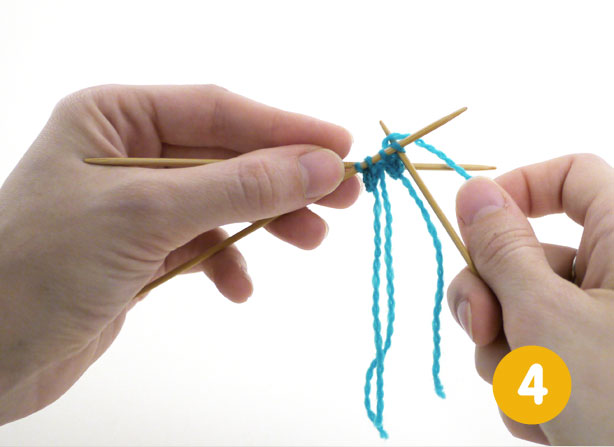
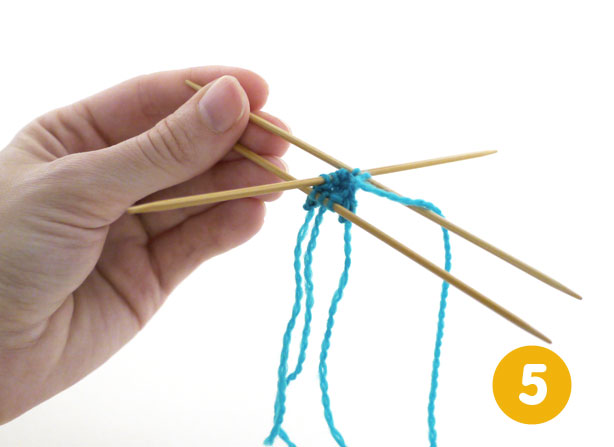
4. Now you will join the legs together by knitting them into one round. Pick up a third DPN, and knit all the stitches on the front needle. When you finish with that needle, flip the needles around so that the back needle is now in front, and continue knitting the back needle. (You don’t need to do anything special with the cut tail, but you can use it later to stitch up the little gap that will be left between the legs when you’re finishing up the piece.)
5. Now that you have knit one round using three needles, you can switch to using four needles for a more natural circular knitting technique. Place the forth, fifth and sixth stitches in the round onto a third DPN, so that you have 3 stitches on the first needle, 3 on the second, and 2 on the third.
Next you will usually work an increase round so that you are working with a larger total number of stitches, which will make knitting on DPNs a little easier. Getting the legs started is the trickiest part in many tiny patterns, so you’re well on your way to making a cute gnome, pirate, or chef!
Yay! I get this quite easily in your zombies pattern. But funny thing is, the one that I didn’t get was making the hands. XP
Thanks for making this tutorial!!! I’m so excited because I finally got it! :)
This helps immensely!! I never could figure how to make the legs on the gnome pattern. I’m trying this today!
I bought several of your patterns and the book Teeny Tiny but with the legs i ve done big messes. And now everything more clear. Thank you
I’m really glad you posted this. It’s hit and miss for me when it comes to joining the legs and this will help raise my success rate. :)