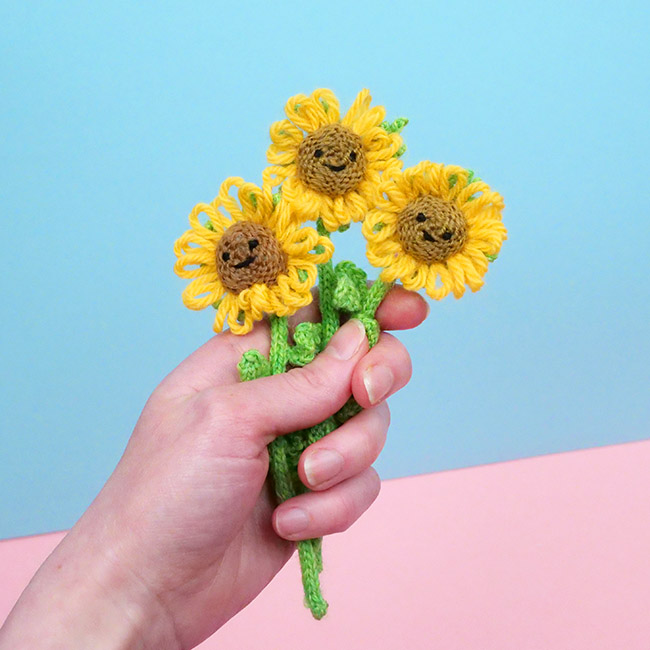
This pattern is free, and for its use I’m requesting a contribution to an organization that’s helping Ukrainians and refugees.
Here are some suggestions.
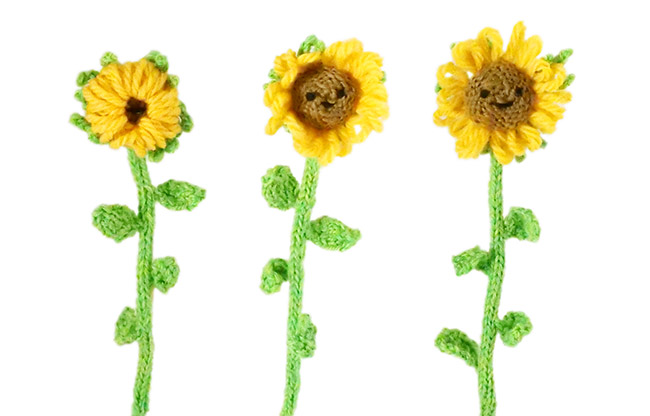
Click or scroll down for the full pattern on my blog. You can also download the PDF version of this pattern via Ravelry.
You’ll need:
– Fingering-weight yarn in brown, green, and black (for eyes and smile)
– Worsted-weight yarn in yellow
– Set of size 1 US (2.25mm) double-pointed needles
– Tapestry needle
– Stuffing (yarn scraps work fine)
– Wire (optional, for a stiff stem)
Techniques: Knitting in the round on double-pointed needles, I-cord
Finished size: About 6” (15cm) tall with stem; flower alone is about 2” (5cm) in diameter
Notes:
– Gauge isn’t important—just make sure your stitches are tight enough that stuffing doesn’t show through the gaps.
– You can scale this pattern up with thicker yarn and bigger needles. (Remember to scale up the yarn for the petals too!)
A list of pattern abbreviations can be found on my How-to page.
——– Pattern starts here! ——–
Flower middle (worked back to front)
With brown, cast on 6 stitches and distribute onto 3 DPNs to work in a round.
Rnd 1: [Kfb] 6 times (12 sts).
Rnd 2: [Kfb] 12 times (24 sts).
Rnds 3-5: Purl (3 rnds).
Rnd 6: [P2tog, p2] 6 times (18 sts).
Rnd 7: Purl.
Rnd 8: [P2tog, p1] 6 times (12 sts).
Rnd 9: Purl.
Insert a pinch of stuffing into the piece.
Rnd 10: [P2tog] 6 times (6 sts).
Break the yarn and draw it tightly through the stitches with a tapestry needle. Flatten the piece into a rounded circle as you weave in the loose ends.
Petals
Cut a long piece of yellow (worsted yarn), place it on a tapestry needle, and embroider petals around the outside of the middle with big, loose loops that are each about half the diameter of the flower middle. Embroidering symmetrically will give you an even distribution of petals.
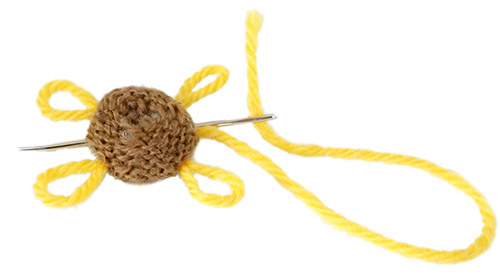
After completing one round/row of petals, begin adding another layer behind the first, filling in petals where the flower looks a bit empty. (You don’t need to create a full second round of petals.)
Flower back
This section is the most complicated in the pattern. Since it remains mostly unseen, you can skip it if you prefer.
With green, cast on 6 stitches and distribute onto 3 DPNs to work in a round.
Rnd 1: [Kfb] 6 times (12 sts).
Rnd 2: [Kfb] 12 times (24 sts).
Rnds 3 and 4: Knit.
Separate spikes
Next, you’ll finish off the stitches as I-cords, working with 2 stitches at a time.
K2, and slip the rest of the stitches from the left needle onto the following needle that already has stitches on it—you’ll work these 2 stitches as an I-cord
Knit 5 rows of I-cord, then break the yarn, leaving a long tail of about 15” (30cm). Place the tail onto a tapestry needle and draw it tightly through the stitches, then work the tapestry needle down through the I-cord and reattach the yarn to the next live stitch. (You can leave the tail on the tapestry needle as you work to save time.)
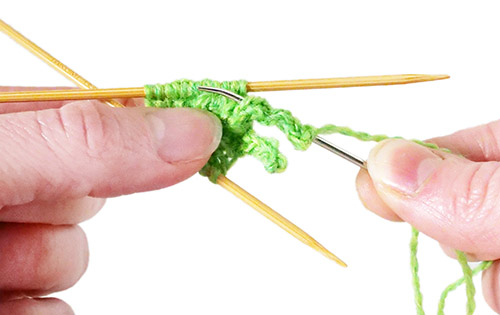
Continue to work each pair of stitches, finishing them off as you go. When you run out of yarn to work with, reattach the yarn from the original ball and cut another 15” (30cm) piece as you did after the first I-cord.
When you’ve finished the last I-cord, weave in the loose ends.
Stem
With green, cast on 4 stitches.
Knit an I-cord for about 45 rows.
Break the yarn and draw it tightly through the stitches with a tapestry needle.
Leaves (make 4)
With green, cast on 2 stitches.
You’ll work the first row as an I-cord, then the rest flat (turning after every row).
Row 1 (work as I-cord): [Kfb] twice (4 sts).
Row 2: Purl.
Row 3: K1, [kfb] twice, k1 (6 sts).
Row 4: Purl.
Row 5: Knit.
Row 6: Purl.
Row 7: K1, [k2tog] twice, k1 (4 sts).
Row 8: Purl.
Row 9: [K2tog] twice (2 sts).
Break the yarn and draw it tightly through the stitches with a tapestry needle.
Finishing
Place the knit side of the flower back against the cast-on side of the middle, and stitch them together around the outside of the back.
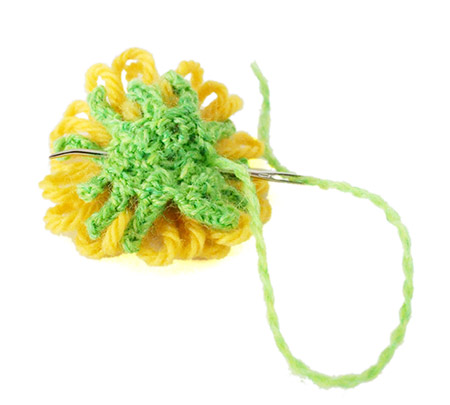
For a stiff stem, fold the tip of a piece of wire and slowly work it through the bottom of the stem all the way up to the top.
Stitch the top of the stem to the flower back.
Stitch the cast-on end of the leaves to the stem.
With black, embroider eyes with two small vertical stitches for each. For a smile, embroider a longer horizontal line between and just below the eyes. Weave in the loose ends, then gently pull the middle of the stitch down into a smile.
Weave in any remaining loose ends.
Your sunflower can be worn as a brooch, hang in a window, pose in a vase, or just brighten someone’s day.
For using this pattern, please make a donation to an organization helping Ukrainians. Here are some suggestions.
© 2022 Mochimochi Land. All Rights Reserved.
Please do not copy or distribute any part of this pattern without permission.
Please do not sell items made from this pattern without permission.

Donation made to Dr without Borders
Thank you for the cute pattern!
Thank you so much for an adorable pattern and even more for encouraging people to date and hel
Donation to Doctors Without Borders. Thank you!
Sent money both to Doctors without Borders and IFAW (International Fund for Animal Welfare) that is helping animal shelters in Ukraine and the Poznan zoo in Poland that is helping to rescue animals from zoos in Ukraine.
Donation to Sunflower of Peace. Thank you for the cute pattern, thank you for helping!
Thank you for this wonderful pattern and for the nudge to donate. Done (Doctors without Borders is my choice for today) and now to make some sunflowers.
Thank you so much to those who’ve left comments here telling me where you’re sending money. And thanks to everybody who’s using the pattern and making donations. 💙💛
Doctors Without Borders is my chosen donation. Thank you for your pattern for such a noble cause. I have signed up for a recurring monthly donation to Doctors Without Borders.
Elizabeth
Made a donation to Sunflower of Peace. Thank you very much for the free sunflower pattern
Donated to Voices of Children. Thank you for the opportunity.