Author: Anna

Announcing Butterfull!

butterfull_announce

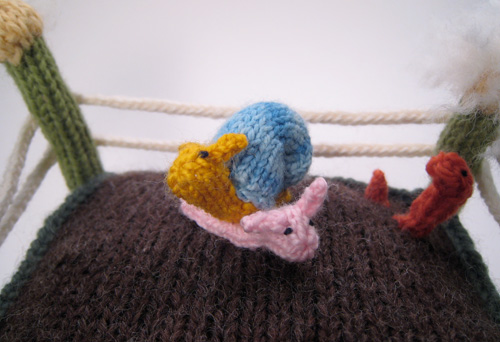
Just two days left until spring is officially here, and Mochimochi Land is getting a head start with a brand-new pattern: Butterfull, the world’s fattest butterfly!

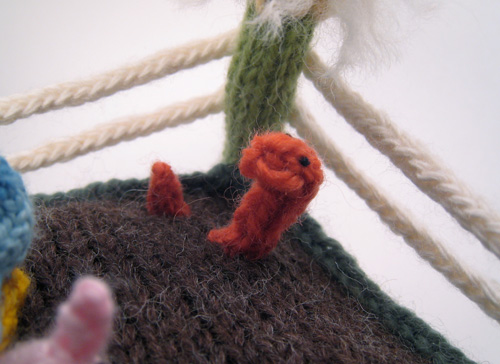
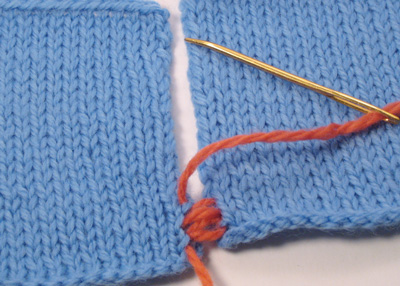
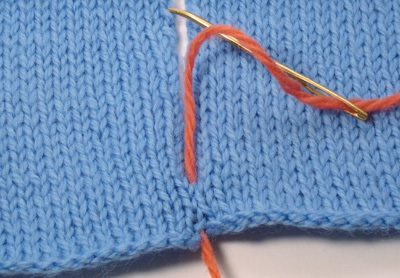
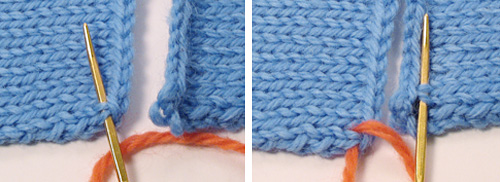
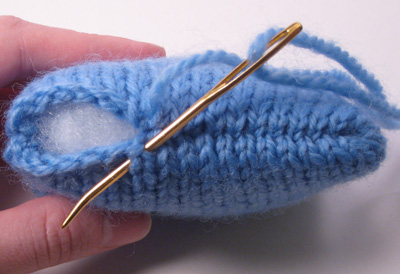
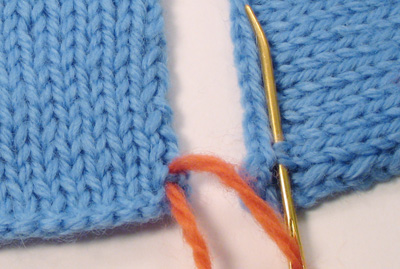
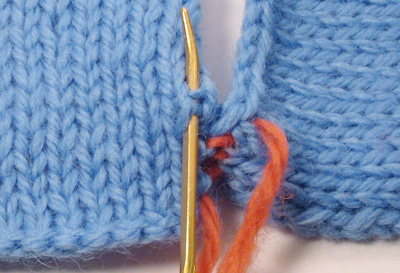
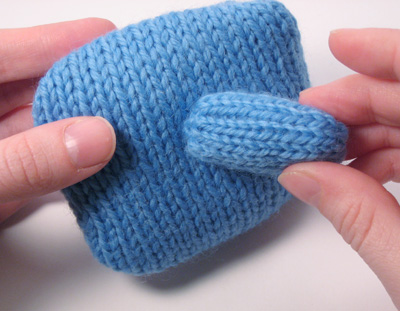
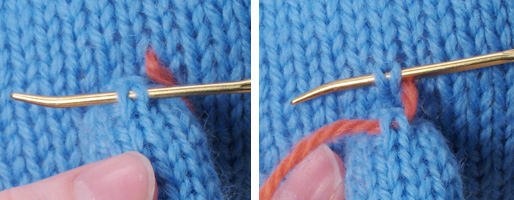
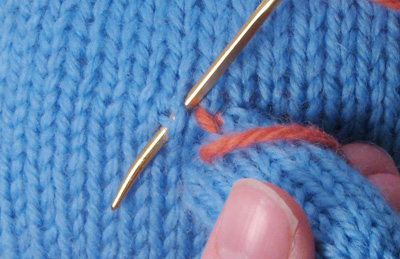
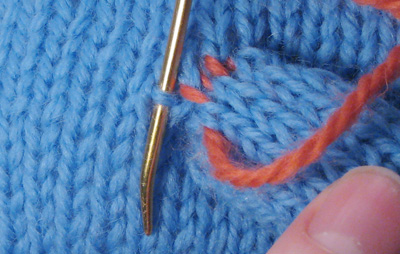
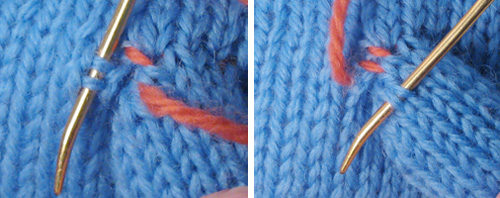
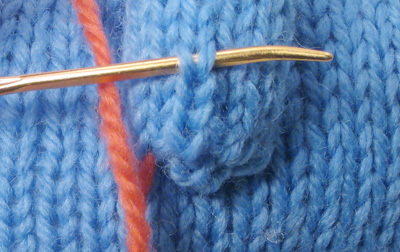
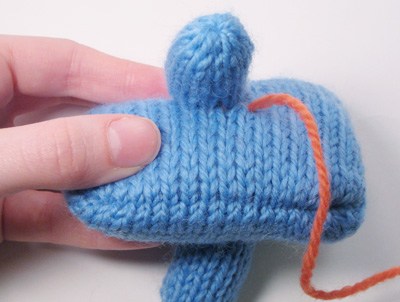
Butterfull knits up quickly, with techniques including i-cord, mattress stitch, and duplicate stitch. And nothing says “spring” like a bouquet of dead flowers, right?

butterfull_flowers

You can buy the pattern as a PDF download here!

Songs About Birds

My sister and I got my mom an iPod shuffle for her birthday last year. She was mildly appalled when I showed her the iTunes store, where you have to buy music? I thought you kids all got it for free on Napster, which is illegal and wrong, by the way!

I asked her what song I should find on iTunes for her, and her immediate request was “Legendary Chicken Fairy,” the most psychedelic song title I’d ever heard. It turned out to be an actual song, by country duo Jack Blanchard and Misty Morgan, who wrote songs mostly about birds in the ’70s. My mom started signing along to the iTunes clip:

Chicken fairy in the sky
Mother Goose’s butterfly
Do whatsever’s necessary
Legendary chicken fairy

Sing a song that’s sanitary
Take my wish o big canary
Legendary chicken fairy…

Then my dad joined in from the kitchen. It was weird and kind of cute. But once the moment passed, my mom refused to pay money for the music by these people who apparently had some part in my parents’ courtship. (“Where’s all that free music I’ve heard about?”) We found some NPR podcasts instead. So for Christmas last year I gave my parents Life and Death (And Almost Everything Else), which includes “The Legendary Chicken Fairy” among its 29 tracks. It got a laugh, if not a long listen.

jackandmistyBut it’s actually an impressive collection of songs. (I had bought the album for myself before getting another one for my parents.) Most of them are clever and melodic, and some are rather beautiful. A lot of them are about birds. I would recommend it to anyone with a sense of humor, and maybe kids.

Free Pattern: Snails and Slugs

This is a free and easy pattern for everyone to enjoy. Please check out the Mochimochi Shop for more patterns that you’ll love!

snailsslugs1

When they’re not vying to determine which species will slowly take over the world, snails and slugs make cute house pets. Knit some up for your friends and hide them in unusual places.

The pattern, which calls for fingering weight yarn, is a tiny bit fiddly, but very fast and super cute! Continue reading “Free Pattern: Snails and Slugs”

Off-Brand Play-Doh

My husband and I bought some “Super Soft Dough” a few weeks ago to entertain our 3-year-old nephew, who was coming to visit for the evening. It turned out to be a success, keeping him entertained for a full 10 minutes out of the 4 hours or so that he was here.

I’ve since been the one to get the most entertainment out of the stuff, which has suddenly become my new favorite medium. (We kept it here, since our nephew tactfully declared “I have lots of this at my house,” when John presented it as a gift.) I love several things about it: it smells nice, it dries quickly, so you have to do something with it right away instead of sitting back and thinking about what you’re going to make, and the neon colors are fab.

Last night I made some nature scenes with it—I liked the effect of landscapes and animals in blindingly hot colors. Tonight I made a swimming pool.

swimmingpool

It’s a fun way to brainstorm without the scariness of a blank page, and really relaxing too, since you can only have so much control over the crumbly substance. I recommend picking some up the next time you pass by a toy store, if you don’t already have some.

Snails vs. Slugs: The Wrestling Match

svswrestling1

For round two of our competition, the gloves are coming off and it’s pure snail-to-slug combat!

We seem to have a clear winner this time. The snail is absolutely flattening that slug! Looks like he’s down for the count.

svswrestling2

Our earthworm referee makes the call.

svswrestling3

The ring is made up of one of those cardboard planters you get at a garden center, filled with potting soil. The polls are dandelions.

svswrestling4

svswrestling5

Next up: the eating contest! But first, I’ll post the free pattern for the snails and slugs here. Soon, I promise!

Making Monsters with Jenny Harada

I spent last Saturday afternoon at a plush workshop taught by the famous Jenny Harada!

The workshop was held at Etsy Labs in Brooklyn, where Jenny took us through the basics of sketching pattern pieces and putting them together with a sewing machine. My hands were too busy to take any photos during the class, but Jenny let me take a quick photo of her with her mound of plushes afterwards.

jennyharada

Aside from making my own plush toy, I had a lot of fun looking through Jenny’s crazy creations and picking her brain about her design process. It’s funny how there are some similarities with making knitted toys, but sewing is still a little foreign to me. I think I’m gradually getting more comfortable with it, though.

So here is the monster I made! His name is Herman.

herman1

Herman’s shape is something I’ve had in mind for a while—I sketched out his body freehand, and I used Jenny’s patterns for his legs and horns. Don’t you love his purply furriness? The fur is great because it conceals less-than-skilled sewing.

Herman’s a lot of trouble, though. As soon as I brought him home, he started trying to eat everything in sight!

He tried to eat John’s stuffed elephant…

herman2

Then he went for the Woodins (log and all!)…

herman3

Even John wasn’t spared!

herman4

So we’ve got our hands full with our new friend. Maybe sometime soon I’ll try sewing something completely on my own!

Mattress Stitch Tutorial (for toys)

For a lot of knitters, seaming finished pieces together is their least favorite part of of a project—it’s time-consuming and can turn out so ugly. But for those who have joined the cult of mattress stitch, the technique of sewing pieces together on the right side for a virtually invisible seam, finishing is a relatively effortless and almost magical process. Mattress stitch is also a very handy skill for making great looking knitted toys.

There are several good mattress stitch tutorials on the web, but since there are some specific issues with seaming toys that aren’t found so much in garment knitting, I thought it might be helpful to do a toy-specific tutorial on the techniques. In this post, I’ll cover the basic “flat” seaming: vertical, horizontal, and vertical-to-horizontal mattress stitch. Then I’ll demonstrate how to use mattress stitch to sew on a 3-dimensional limb, such as an arm, and also how to sew on a limb at an angle. (I’m not going to do any techniques for garter stitch, since I rarely use it in my toys.)

Vertical Mattress Stitch

Vertical mattress stitch is used to join the edges of two pieces together when the knitting is running the same direction on both pieces . Among Mochimochi Land patterns, Grass, Evolving Punk, andLuvgun call for this basic stitch.

Start by placing your two pieces side by side with the right sides up. For toys, you will actually often start by holding the pieces together with wrong sides facing each other, but the technique is exactly the same, and easier to demonstrate when laid flat.

Insert your tapestry needle under the horizontal bar between the first two stitches on the edge you want to join.

verticalmattress1

Pull the yarn through and slip the needle through the opposite horizontal bar on the other piece.

verticalmattress2

Continue to go back and forth under the horizontal bars along the seam.

verticalmattress3

Now for the magic: pull on the yarn to tighten up your stitches…

verticalmattress4

And they disappear entirely! No matter now how many times I see that, I still ooh and ahh at the trick.

So that’s the basic mattress stitch, and it’s beautiful. But what if you need to seam around all of the edges of the pieces, as with many toys? When you get to the top of the knitting, you can simply turn the corner and seam the top of the knitting together with horizontal mattress stitch.

Horizontal Mattress Stitch

This stitch is used when you are seaming together the cast-on or bound-off edges of two pieces of knitting. If you’ve just finished vertically seaming up one side of the knitting, just turn the corner and continue with horizontal mattress stitch. (It will look pretty strange at first, but when you tighten up your yarn, the seam will disappear.) Horizontal mattress stitch is also used when sewing up the holes between the feet or ears of animals, as in the Mochimochi Reindeer.

For clarity, I’m again demonstrating this technique with the knitted pieces side by side, though with a toy you would normally be holding the pieces together with the wrong sides facing each other.

Insert your needle under the point of the V of the first stitch. Pull the yarn through, and do the same with the opposite stitch.

horizonmattress1

Continue back and forth across the edges, tightening up your yarn a bit after the first few stitches.

horizonmattress2

Here’s a photo of our square seamed together all around the sides, using vertical and horizontal mattress stitch. Since you’re sewing on the outside of the knitting, you can stuff as you go before closing off. (On a side note, if you’re using safety eyes, remember to attach them before closing off.)

horizonmattress3

Vertical-to-Horizontal Mattress Stitch

Sometimes, you need to seam together two pieces with the knitting running perpendicularly. This occurs in the pattern for Tubby, for example.

The technique, as you might expect, is basically a combination of vertical and horizontal mattress stitch. Insert your needle under the horizontal bar of one piece, then under the opposite V of the stitch in the other piece.

perpmattress1

However, since rows of knitting are slightly more compact than horizontal stitches, they usually won’t match up with a perfect 1:1 ratio, and you will need to make some adjustments as you go along the seam. This is best done by occasionally inserting your needle under two horizontal bars at once.

perpmattress2

There isn’t an exact formula for how often you will need to insert your needle under two bars instead of one to make the two pieces match up; you will need to eye it for yourself as you go along. This can seem a bit tricky, but the good news is that the seam will again be virtually invisible once you’re finished, and you shouldn’t be able to tell where you made the adjustments.

Sewing on a Limb (perpendicularly)

Above, we have seen how mattress stitch can make beautiful seams when joining flat pieces together. It’s even more of a lifesaver when attaching limbs (arms legs, ears, etc.) to a toy. Again, it’s almost invisible, and it also makes it easy to sew on limbs at any angle.

Let’s attach an arm to our square, which we’ll now call the toy body. First, decide where on the body you want to place the arm.

limbmattress1

You’ll see that some of the stitches on the arm line up with the horizontal stitches on the square. That’s where I like to start seaming, using horizontal mattress stitch.

limbmattress2

Soon, the stitches stop lining up, and you have to turn a corner, so to speak. Insert your needle under one side of a stitch on the body, and up through the middle of the stitch immediately below it (or immediately above it, as the case may be.)

limbmattress3

The next few stitches will line up vertical-to-horizontal, so continue with vertical-to-horizontal mattress stitch.

limbmattress4

You’ll then turn the corner again, and switch back to horizontal mattress stitch. Continue to seam around the circumference of the arm until you arrive at where you started. You will end up with an arm that is sticking straight out.

limbmattress5

Sewing on a Limb (at an angle)

Not all knitted toys want to hold their arms straight out. Some want to have them down at their sides, or reaching upward, or out in front of them.

Since we’ve attached one of our toy’s arms out straight, let’s angle the other arm down at its side. First, sew along the side of the arm opposite from the side to be folded down or up—in our case, the top of the arm, since the bottom will be folded down. Use horizontal mattress stitch along the top of the arm, then turn the corner with a diagonal stitch, just as you would with a straight-out arm.

Now we’re on the front side of the arm. For the next stitch on the body, insert your needle under two stitches. Then, instead of inserting your needle under the bottommost stitch on the arm, insert it under the next stitch up.

limbmattress6

Repeat this along the side of the arm, until you get to the part of the arm that should be flat against the body. (Since our arm is relatively small, we’ll repeat only once more.)

Now you’ve reached the bottom of the arm, or the armpit. Use horizontal mattress stitch to continue along the bottom, but for the stitches on the arm, now insert the needle under the third or fourth V-stitch from the base of the arm.

limbmattress7

This will pull the arm downward.

limbmattress8

Once you’ve finished with the armpit, continue up the back side of the arm, in the same way that you did with the front side: insert your needle through two stitches on the body, and through the second-from-bottom stitch on the arm.

When you come back around to the top of the arm, you will end up with a nicely downward-pointed limb. And a new friend!

mattressman

I hope this tutorial comes in handy to some people. I would greatly appreciate any feedback, and I’m happy to answer any questions in the comments.