Author: Anna

Shop Talk: Self-Publishing Patterns

Thank you for all the comments to last Friday’s inaugural Shop Talk post! Sometimes the thing that stops me from talking about how I run my design business is the idea that I ought to have actual wisdom to impart, but I also understand that it’s helpful just to hear about someone’s personal experience, even if they’re not so wise.

Since last week I wrote about how I got started, I thought I’d take this week to go into more detail about what exactly it is that I started. I bet many of you are familiar with the basics of how independent knitwear designers (or notwear designers, in my case) make a living: we knit up something lovely, we write up the instructions on how to make it, and then we sit back and watch the money pour in as thousands of knitters buy the PDF pattern as a download. Right? Well, not entirely wrong, but it’s not so simple either.

shoptalk2

For the curious, here’s a step-by-step breakdown of what goes into my pattern making process.

1. THE IDEA
I have an idea for a toy. If it’s something that I’m excited about knitting and something that I think other people might want to knit too, I get started on the design. (Occasionally I also do a search on Ravelry to make sure there isn’t something too similar already out there.)

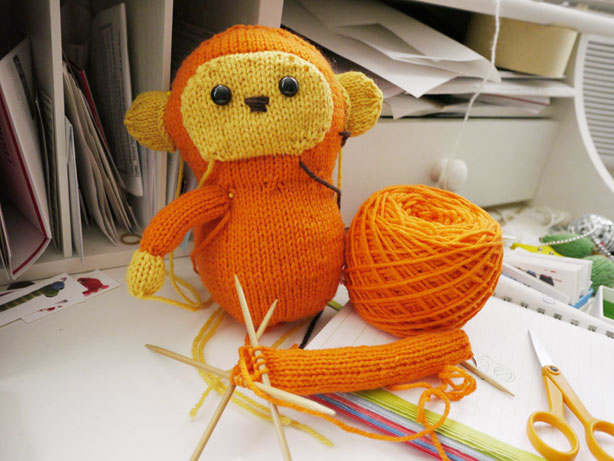
2. THE DESIGN
Design time! The time involved in the design process can vary wildly, from hours to weeks, depending on size, complexity, whether I have to start over a few times… a while back I wrote a more detailed description about what goes into designing a toy.

monkeydesign

3. THE PATTERN WRITING
Once I have a finished toy that I’m happy with, I start writing up a proper pattern using the notes that I took as I was making the toy. Like the design process itself, this can take hours or days, depending on the complexity. (I do refer back to my older patterns for wording, but I also strive to always be making my instructions as clear as possible, so I still find myself struggling with how to best describe techniques that I’ve been using for years.) As I type up the pattern, I make notes to myself about which parts should have a photo illustrating a particular step.

4. THE RE-KNITTING
Once I have the basic pattern written up, I also have a list of additional things I need to knit for the photos that will go in the pattern. Depending on how many steps need photos, I might be re-knitting parts of the project two or three times over to show different techniques. (I like to have all the materials ready for the photo shoot, instead of stopping along the way to knit and take actual process photos. Although sometimes I’ll go in reverse, shooting a later step, then ripping it back to an earlier step for the earlier photo.) I also often make an entirely new toy using different colors or some other variation. Because variety!

5. THE PHOTO SHOOT
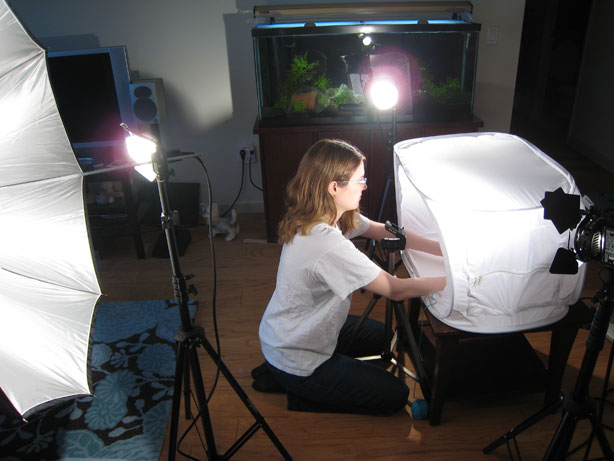
Photo time! In addition to the step photos, I take white-background photos of the toy from multiple angles—it’s always better to take more photos than you think you’ll need rather than realize you need more and have to set everything up again. Speaking of setting up, here’s what my setup looks like, more or less.

lightscamera

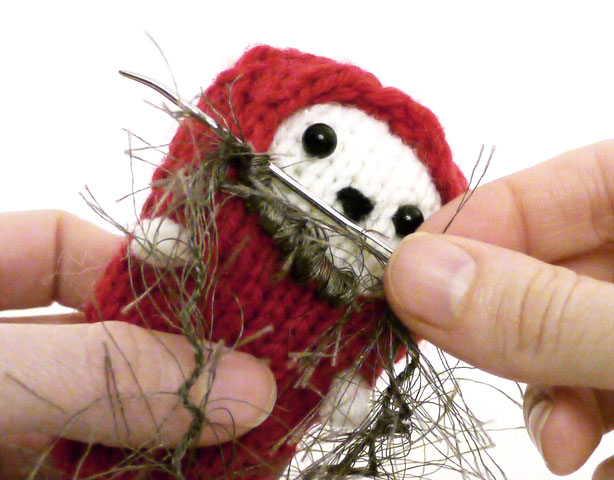
(If I look sweaty and disheveled in this photo, that’s because those lights are hot! And I’m usually just naturally disheveled.) I use a tripod and my camera’s timer to take photos that involve both of my hands, like this one.

bears_fuzz

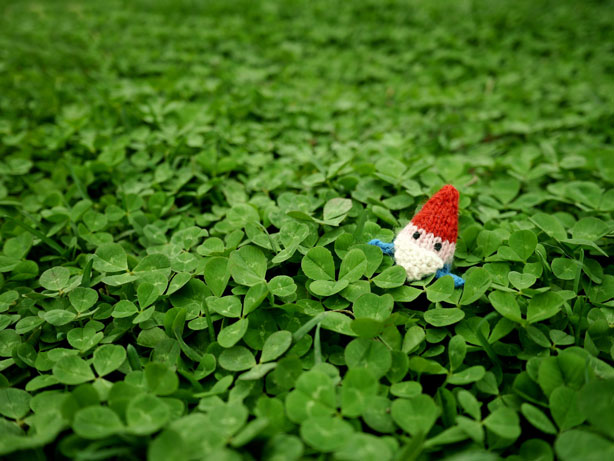
I also try to take other, more fun photos in natural environments. It’s interesting how some toys are so much easier to shoot out in the world than others!

gnome_clover

6. THE PHOTO EDITING & PATTERN FORMATTING
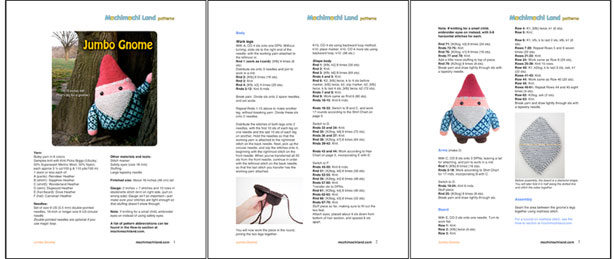
The photo fun continues as I use Photoshop to adjust what I’ve taken (including erasing the backgrounds) and insert the photos into the pattern. I also play around a little with page layouts at this point, trying to get to as close to a final pattern as I can. There are lots of different software options for this, but I’ve found Word, despite its shortcomings, to be easy to use and just fine for my patterns.

samplepattern

7. THE TESTING & EDITING
Now that I have a pattern, I send it out to my testers and my tech editor. This is a crucial step, because no matter how many times I closely read over a pattern, I can miss little errors. And instructions that seem natural to me may be baffling to someone else who isn’t living in my head.

8. THE FINAL EDIT
The feedback from testers and tech editor is in, and I make the final edits to the pattern. Final pattern achieved!

9. THE RELEASE PREP
Now it’s time to begin the process of releasing the pattern out into the world. I go back to all those photos I took in Step 5 and reformat some of them as images to use on my website (homepage, shop, and blog) and Ravelry ads (if I’m going to advertise).

luvbotsad

I also write up descriptions to use on my blog and email newsletter.

10. THE RELEASE & PROMOTION
On release day, I start by uploading the pattern to E-Junkie, my download service, and I get the button code for my website. Once I’ve put the pattern up in my shop, I list it on Ravelry, then I start the announcements: newsletter is first, then blog, Facebook, Twitter, Pinterest, Flickr…. there are probably more that I should be using, but that’s enough for me!

11. THE RESPONSE
Now I wait and see what kind of response I get. There are usually a few questions from customers that come in when I first release a pattern. And the first week that I have a new pattern out, I’m often on Ravelry, checking to see if any projects have been listed. It’s always exciting to see the first one!

So that gives you an idea of what goes into releasing a pattern: a lot of time invested up front! Most of the time I seem to have two or three different patterns in development at once, each at a different stage. (Right now I’m at Step 2 and Step 6 with two projects.)

And of course, with all that, there’s no guarantee that a pattern will be successful—after doing this for seven years, I’ve gotten only slightly better at guessing what will be popular with knitters. Getting a pattern noticed is it’s own process that I’d love to go into more detail about in a future post.

But if any of you budding designers are wondering if it’s worth all the work, for me it’s worth it when I get to see this:

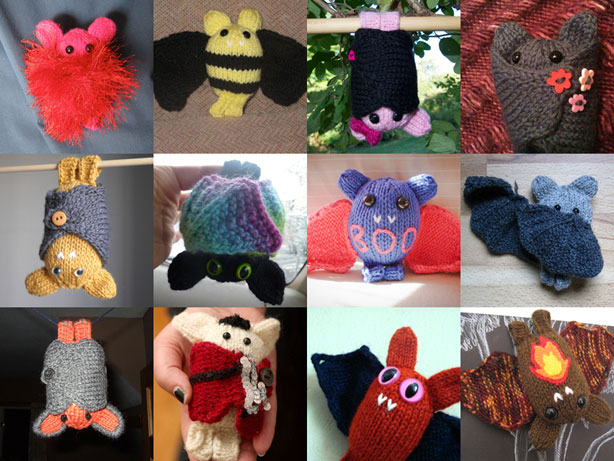
boo2012

To date, there are 950 Boos listed on Ravelry, each one of them unique and awesome. Getting to see my idea realized in someone else’s hands is simply the best part of this job.

Previous posts in this series:
How I got Started

Kalliopi’s Phone Sheep

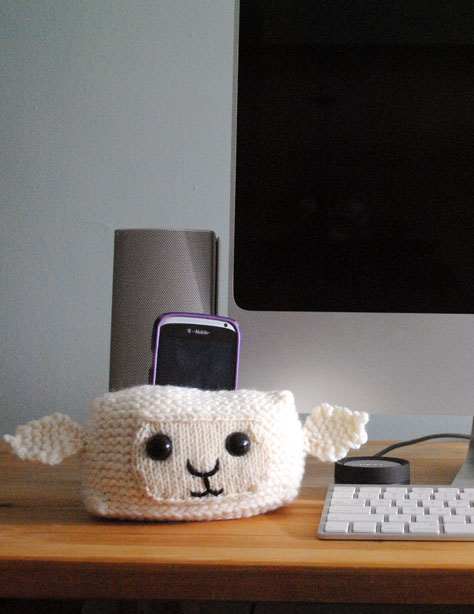
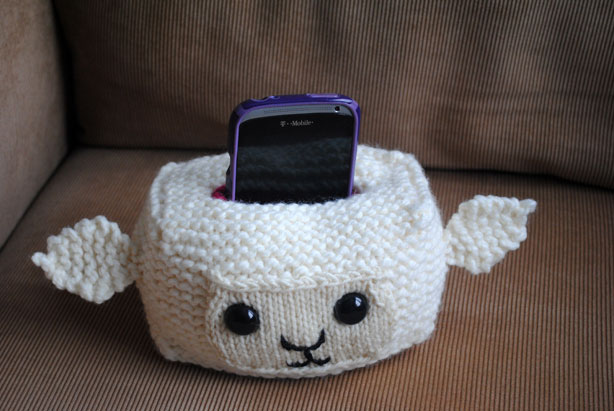
I’m excited to share another adorable project by someone who took my toy design workshop at the Lion Brand Yarn Studio back in October. Kalliopi came to the class with a really specific idea: She wanted to design a cell phone holder in the shape of a sheep’s head. And here it is, just like her sketch!

cellphonesheep1

Super cute! I’ve always said that my cell phone needed an adorable animal to snuggle with when I’m not using it. And you can even make one of your own—Kalliopi’s pattern is available for purchase via Ravelry.

cellphonesheep2

I recall that in the workshop we talked about making a boxy shape by knitting a rectangular flat piece first, then picking up the stitches around the four sides of the rectangle and knitting them in a round to make the sides. (This is a technique that I’ve used in several of my more angular designs.) The pocket on top is a matter of binding off stitches in one row and casting them back on again in the following row. But I think it’s the details and proportions of the face that really makes the design. Nice job, Kalliopi!

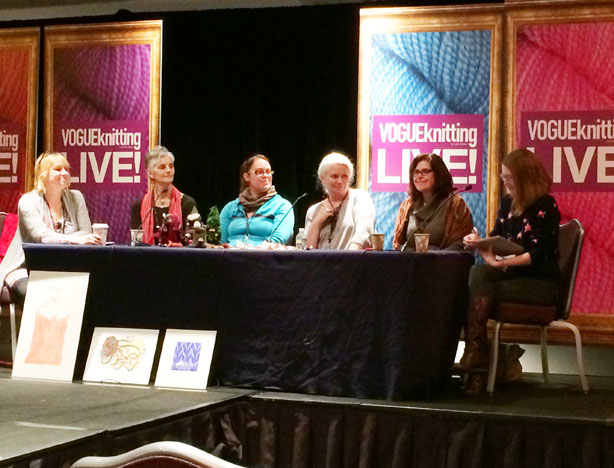
By the way, I’ll be giving a talk all about designing knitted toys this Sunday (1/19) at Vogue Knitting LIVE in NYC! Come to the marketplace stage at 11am to catch it.

Micro Gnome

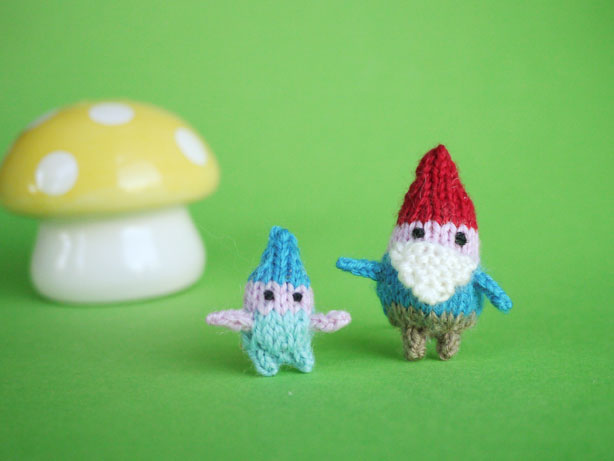
Just when you thought the tiny gnome couldn’t get any tinier…

micrognome

I’m already getting excited about knitting a ton of these guys for a fun photo shoot! There will also be a pattern, probably in the spring.

Shop Talk: How I got Started

shoptalk1

2014 marks two and a half years that Mochimochi Land has been my full time job. (It was my almost-full time job for four and a half years before that.) I don’t normally talk shop here, but since it’s a new year and maybe some of you are thinking about starting new projects, I thought I’d begin a weekly series of posts about being a designer and running a small business. Today, my story of how I got started.

One of the best things about my job is that I get to do so many different things: I design patterns, of course, but I also work a lot with images (photography and graphics), I write, I teach, I make art, I give presentations, and I pack and ship online and wholesale orders. Pretty much none of this is related to what I studied in college—my major was media studies and Japanese—so if you had told my just-graduated 22-year-old self that I would be doing all of these things as a job ten years later, I would have said you had the wrong person.

After college (and an extra year studying in Japan), I moved to NYC with John, and my first (and only) “real” job was at an art agency and gallery. My work mostly consisted of coordinating projects by email and looking at contracts, but being around art was something new and inspiring for me. After a year or so I decided that I was ready to do something else, but I didn’t have anything specific in mind. I did have a knitting hobby, which had started in college and had grown more intense thanks to my mother-in-law, Bonney. I had also just designed my first toy in 2007, blobby creatures for my coworkers.

blobs

When I made these guys, I didn’t instantly think “THIS will be my new job,” but I did think “This is awesome and I can’t wait to design all sorts of toys!” I had a new passion, and after talking about it with John, I decided to take a few months just to knit toys and blog about them, and see where that might lead, whether to a different idea, a new career direction, or just some time for reflection before looking for a new job. It was a big help, of course, that I had a supportive husband and the financial flexibility to leave my full-time job. When I gave my two weeks’ notice in early 2008, my boss suggested a part-time arrangement instead, which turned out to give me a nice balance of freedom with my new project and a little stability with my office job.

The first place I shared photos of my toys was Flickr—I remember putting a photo of the Uh-Ohs (one of my first designs) in a knitting group, and before long I was seeing comments from people asking for a pattern. When I replied that I’d never written a pattern before, I received offers to test from these helpful strangers. That’s how I got my first testers, who helped me figure out how to write and format a pattern. (One of those testers was Angela Tong, who is now a designer and teacher in her own right.)

I still remember the brainstorming session that John and I had when we were trying to come up with a website name. Eventually I suggested something with the word “mochi.” Why? Because it was one of my favorite Japanese foods; because it’s soft and squishy, like a toy; and because I wanted to make toys inspired by minimalist Japanese character design, so a fun Japanese word seemed fitting to me. Mochi.com was taken, and so was mochimochi.com. So the “land” in Mochimochi Land was just a matter of URL necessity at first, but as my designs grew in number, it seemed natural that they should exist in their own imaginary land. (And at some point people started referring to my creatures as “mochimochis” and as “mochis,” which was also not intentional from the beginning, but a happy development that I embraced.)

newhomepage

Aside from Flickr, I had some early online press from Craft magazine that brought people to my website. But my audience really grew in 2009 after I signed up for Ravelry, which was still pretty new at the time, and exploding in popularity. Seeing all the excitement for Ravelry as an online meeting place for knitters, it was beginning to dawn on me that there was actually a market for digital patterns, and it might be bigger than I’d thought.

At this point you’ve probably figured out that I never wrote a business plan. My plan was just to start really small, publishing a few patterns as I went, and see what happened. It helped that there is little overhead in basic pattern making: I just needed the knitting supplies, a camera, and a computer. As time went by, I gradually added other dimensions to my business, like teaching and taking wholesale orders for kits.

As I’ve grown my design business, I’ve also taken on big knitting projects that aren’t directly related, like art installations and eventually also animations. These projects didn’t fit anywhere into a profit-making plan, but as a self-employed, self-directed person, I’ve wanted to continue to challenge my creativity, keeping my curiosity alive while I turned my hobby into my job.

greetingsfrom_blog1

If there’s something to take away from my “how I got started” story, I think it’s that there’s no secret formula to starting a small business, and it’s OK not to have it all figured out right at the beginning. But it does help to have a close-to-obsessive passion about something, an inclination for working independently, and the willingness and resources to invest a few years in it before you can make it your main income.

If you have any business or designing questions, or a suggestion of something else I should talk about that relates to these topics, or if you have your own story to share, I’d love to hear from you in the comments!

Inspiration: YOMSNIL

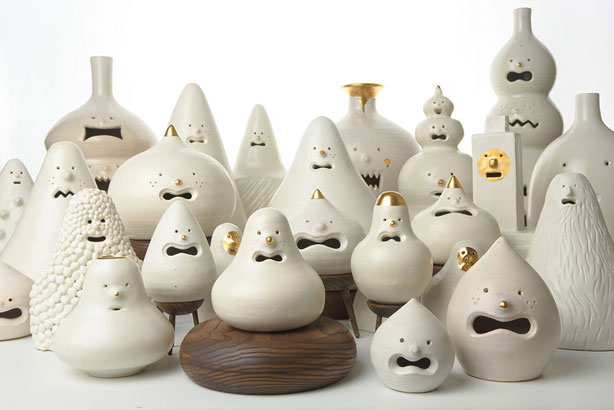
One of the things that I like about January (and there aren’t that many) is the way that I feel more open to inspiration and new ideas at the beginning of the year. It’s a time to try new things, or at least to think about trying new things! My new thing is pottery: I took a short wheel class in December, and I’m going to continue with another class that starts soon. I’m a complete beginner—and I have the lopsided bowls to prove it—but I’m inspired to continue when I see things like this.

yomsnil1

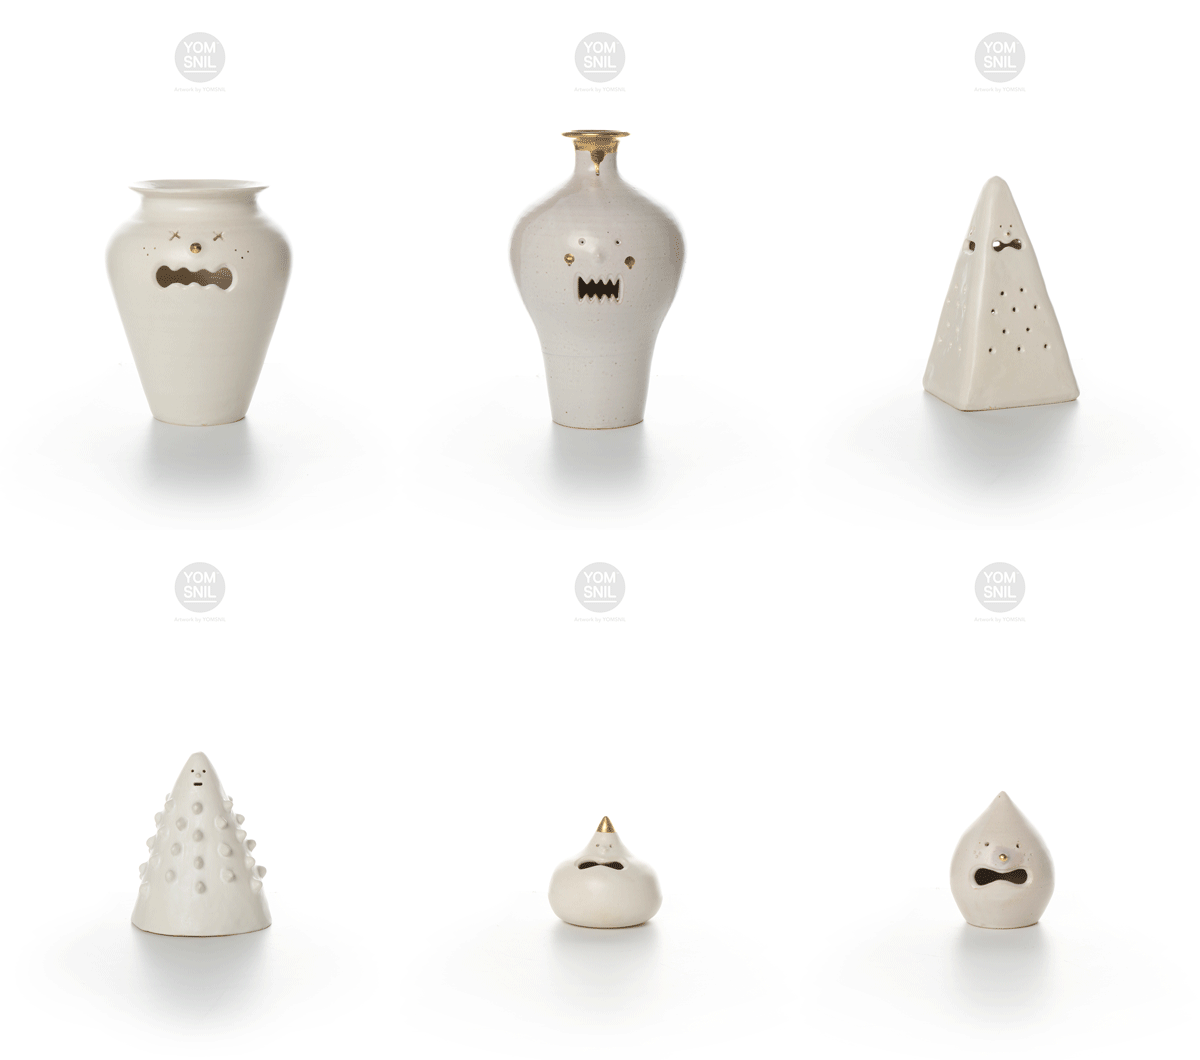
These are porcelain pieces by Korean artist YOMSNIL, whom I discovered thanks to Pictoplasma. I just adore the expression and life that the artist achieves with simple vessel shapes. I think that playing with clay myself a bit recently makes me appreciate how he worked with the soft material, making characters emerge from it with gentle poking and carving.

yomsnil2

Even if I never make anything this cool myself with clay, it feels good to work with a new material—it’s like my hands are learning a new language. See more on YOMSNIL’s website.

Teresa’s Super Star Wedding

It’s still well below zero here today, but I’m coping with coffee, knitting, and focusing on happy, inspiring images. Like these adorable starry wedding photos from Teresa, who knitted 88 Lucky Stars as favors for her and her fiancé’s guests.

luckystars_teresapoet1

I was especially excited to see these photos in the Flickr group because I too made knitted wedding favors when John and I got married in 2006. (But they weren’t nearly this cute, or this much work!) I’m so tickled when people make mochis a part of their happy day.

luckystars_teresapoet2

And wow, how awesome is that dress!?

luckystars_teresapoet3

I’m really rooting for this adorable couple. They’re off to a great start! The beautiful photos are by Jessica Shilling Photography.

Kitschy Dog Winner and a Discount for All

It was great to hear about people’s favorite knitting projects from 2013 in the comments on my kitschy Christmas dog post from earlier this week. You were a busy bunch last year!

And the randomly-selected winner of the kitschy Christmas dog from 1940s Japan is… Commenter #19, Anita!

My favourite project this year was my Sixareen cape by Kate Davies, my first fair isle project.

Congrats, Anita! I just emailed you for your address.

The rest of you deserve a little something for the new year too, so how about a discount on ALL of the PDF patterns in the Mochimochi Shop?

hello2014

Happy 2014, everyone! Let’s make it a year full of inspiration, art, and love.